A few months ago I wrote about being in focus, both technically and mentally. I want to go a little deeper into how technical focus happens in modern cameras and an an experience I had recently where what I did was out of focus.
What is focus
Technically, focus is simple when the lens is adjusted so that the part of the subject you are most interested in is sharply defined. Your lens has a focus ring to use to manually focus. Most of us probably use the camera’s built in auto focus capability. This is much more precise than my old eyes. And a lot faster than most of us can do manually.
Focusing physically moves one or more of the lens elements inside the lens barrel. This is required to adjust the focus point.
I will let you argue whether focus is an absolute, precise point or just an acceptable range. I will just say that I am swinging away from being adamant about absolute technical perfection and leaning more toward artistic judgement and intent. Set your own values you will live by.
Whether we manual focus or use auto focus, we observe in the viewfinder the image moving from a fuzzy blob a crisp, detailed representation of the scene before us. Unless we have a very old piece of technology in our camera with something called a split image viewfinder. I had this in my first SLR. It was magic and awesome for most of the subjects I shot.
The split image viewfinder showed the image sharp regardless of focus. The image was divided into 2 pieces in the central circle. The pieces were offset from each other when out of focus. Use the focus ring to bring the 2 halves into alignment and the image was sharply focused. Magic. Enough trivia, though.
Little did I know this was a type of and precursor to what we now call phase detection auto focus. Let’s get a little deeper into the technology.
How does it work?
Auto focus in a DSLR or mirrorless camera is complex and requires many precise components. But it works so well now that we tend to take it for granted.
There are 2 basic technologies in modern cameras. The older one is called contrast detection and the newer and better one is called phase detection.
I have written on histograms, a subject I consider vitally important to photography. Histograms and their interpretation are the basis of contrast detection auto focus. It is brilliantly simple in concept and in process as what we do when we are manually focusing.
If an image in the viewfinder is out of focus, the pixels are blurred together. Kind of like looking through a fog. A result is that in the histogram, the values are clustered in the center. This is an indication of low contrast. But when an image is sharp, there is a wider range of brighter and darker pixels. This illustrates it:
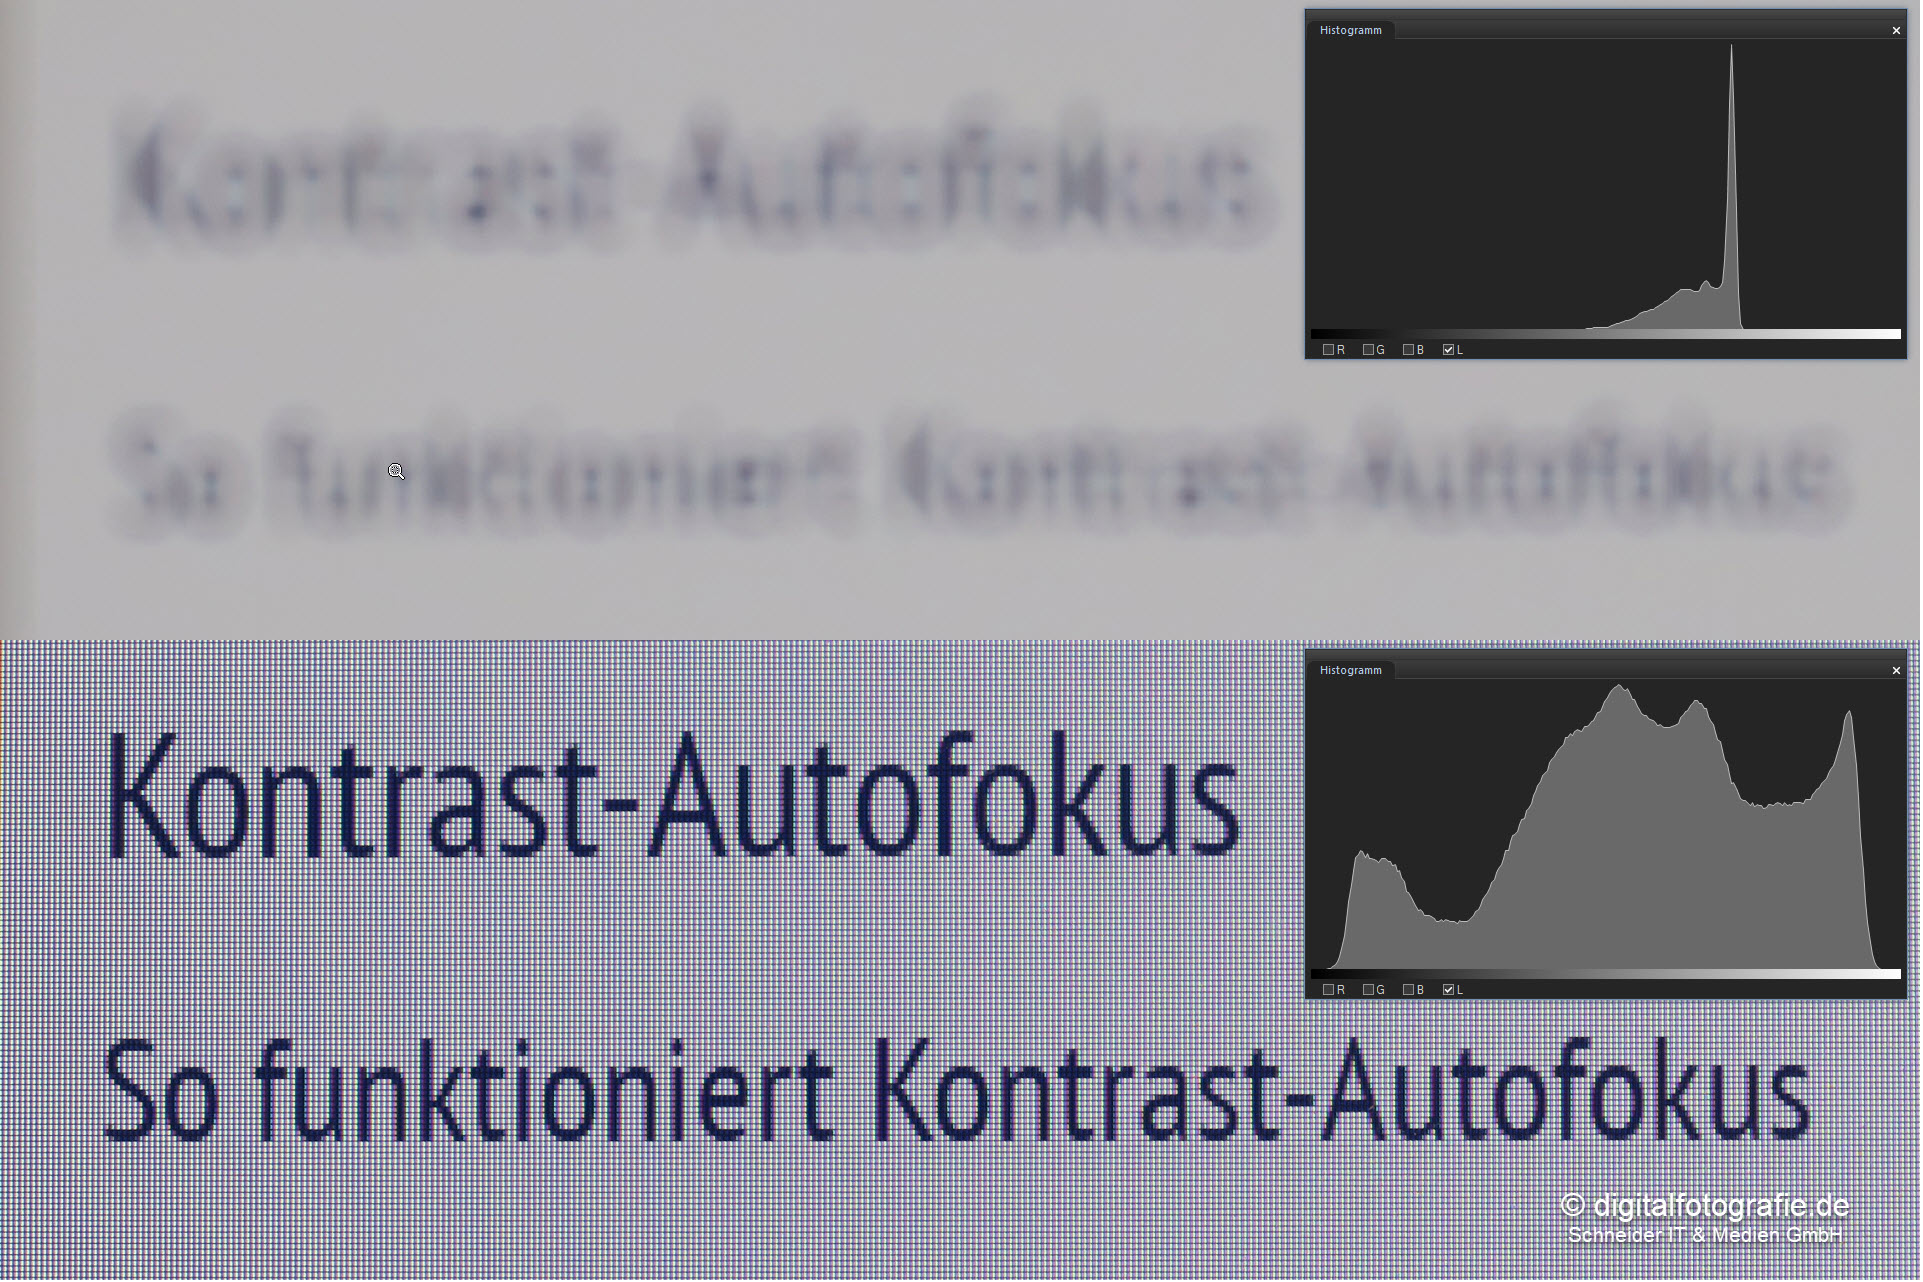 From https://digital-photography.com/camera/autofocus-how-it-works.php
Focus process
So conceptually, the system moves the focus a little and measures again to see if the histogram got more narrow (more out of focus) or wider (sharper) . If it got more in focus, continue moving that direction and measuring until the peak contrast if found, But if it got more out of focus, move the focus the other direction and continue the process. It is a hunting process to find the optimum focus point. Just like we do to manually focus.
Unfortunately, this process is slow. It can take seconds to arrive at the focus. This is why phase detection auto focus came to prominence.
In phase detection auto focus, some of the light coming through the lens is split off to a separate sensor. Like the split image viewfinder I mentioned above, it is further split into two paths. Through some brilliant engineering, they can determine in one measurement how far off focus is and in what direction. The focus moves there quickly. Note that in mirrorless cameras all the light goes directly to the sensor, so these auto focus sensors are built directly into the sensor.
I said that phase detection is “better” than contrast detection. That is true as far as being very fast. Actually, contrast detection can achieve more precise focus. There is a kind of system called hybrid the combines the strengths of both. I will not discuss that or go into the bewildering variety of focus areas or focus modes.
Out of focus
This is all great as far as technology goes. It works quite well in the cases it is designed for. We are lucky to have it.
But all of these systems rely on the sensor having enough light to see some contrast. It doesn’t work in the dark. Yes, there is another variation on auto focus that is called active auto focus. It shoots a red beam from the camera to illuminate the focus area. This has a very short range and does not help the scenario I’m about to describe.
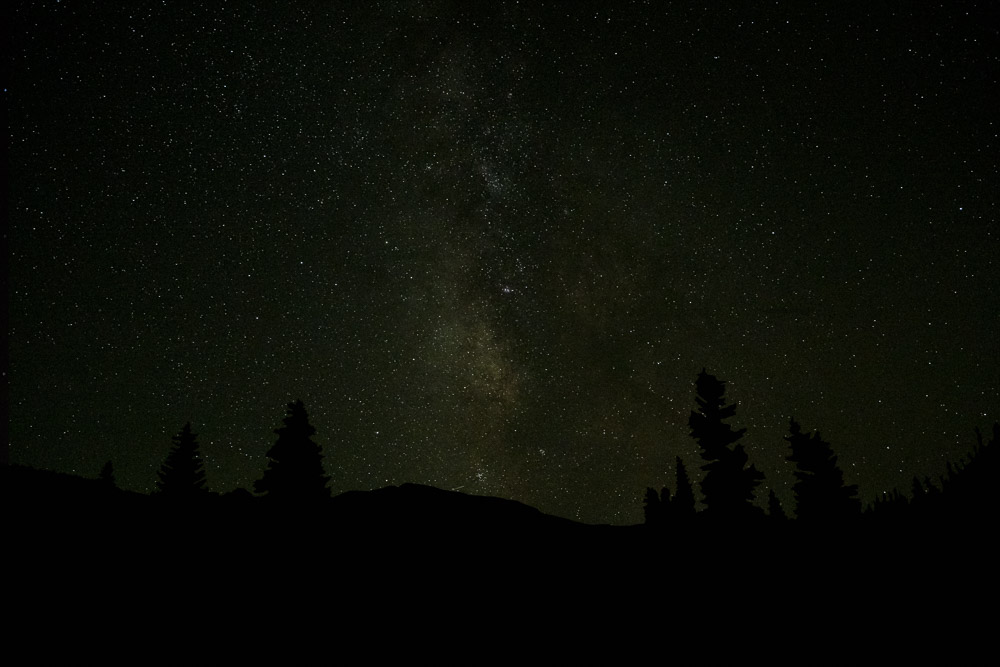
Recently I was in Rocky Mountain National Park, over on the west slope where there is little light. It was full dark on a moonless night. The mountains all around provided lovely silhouettes. The stars were astonishing. Beautiful. I had to stop and get some star images.
A trailhead parking lot provided a great and convenient place to set up – wondering if those occasional sounds I heard in the dark were bears. I guess not. It was perfect. Except. There was not enough contrast to focus, even at 6400 ISO. And the viewfinder image was too noisy to be useful for manual focus. I did not have a powerful enough flashlight to cast enough light on the nearest object, over 100 yards away, to allow the focus system to work.
Adding to the problem, the lens I brought on this outing did not have a focus scale (a curse of modern zoom lens design). Normally, in low light, I switch to manual focus and set the lens to infinity for a scene like this. I guessed, but missed badly for a big section of the images. They were uselessly out of focus. I am ashamed to show an example, but like this:
 ©Ed Schlotzhauer
Experience is a great teacher
I write frequently advocating that we study our technology to become expert with it. And to practice, practice, practice to know how to use our gear, even in the dark. I failed. I encountered too much dark and a lens I had never tried to use in low light. The combination tripped me up. I am ashamed to admit I did not follow my own advice well enough.
But every failure is a learning opportunity, right? It can be a great motivator and reinforcer. I did some research and discovered a “hidden feature” I never knew my camera had. It should save me the next time I do this.
My Nikon camera has a setting I had never paid any attention to called “Save focus position”. When On (the default) it remembers the focus position of the current lens when the camera is turned off and restores it on wake up. But when Off – this is the brilliant part – it sets the lens to infinity on wake up. Now I will have a known infinity focus setting, even in total darkness! This setting is now in my menu shortcuts so I can access it quickly.
I would never have learned about this feature if I had not failed so spectacularly. Experience really is a great teacher.
So dig into those obscure settings you never bother with. There sometimes is gold there.
Keep learning and failing!
The featured image
That night’s shooting was not all bad. I nailed the focus on this star shot. It was purely of the stars and had no foreground. This foreground has been substituted from another blurry image that night (actually, redrawn by hand).
This is artistic expression rather than literal reality. I do that a lot. As photography progresses and matures, I believe that is more and more the norm.