An artists journey

Category: Craft

  • Constraints

    Constraints

    I have written about this before, but I feel it is time to revisit it, maybe from a slightly different point of view. We have constraints on almost everything we do. Usually we try to find ways to avoid or relax the constraints. I am suggesting that they can actually be useful, Working within constraints can make us a better and more creative artist.

    Constraints

    Constraints are anything that bounds us, that limits what we can do. We all have them. You aren’t able to go on a 6 month art sabbatical because you have to work to earn a living. I would like to get the latest super mega pixel camera – no, I need it, really. But I can’t afford it. I feel limited because I don’t have a great wide angle zoom or super telephoto.

    Wherever we turn we bump up against constraints. Time and money are the overriding classics. And there are technology limitations and constraints imposed by our families, school, and job. Maybe the inability to travel to the locations you want. Everything seems to be conspiring against us.

    They seem to limit us as artists

    I was having a discussion recently with a friend I respect a lot. A very good professional photographer who you would know. He was observing that he has always taken multiple camera systems with him on shoots, along with all the associated lenses, batteries, etc. But he is getting older and all that slows him down and makes the experience less pleasant.

    Isn’t this common for photographers? We feel like we have to have LOTS of equipment. You may need that 600mm for a bird shot. You may need that tilt/shift lens to do architectural photography. The portable flash system would come in handy for portraits. Having a small mirrorless camera is good for travel photos, but you might want that medium format system for fine art scenes you find. We always need more gear.

    How can we capture the image we want unless we have that exact, perfect piece of equipment? Well, maybe we have to think. More on this later.

    How to work around our constraints

    We have freedoms of choice in our lives. Don’t have enough money? Earn more. Don’t have time? Get out of the working world and use your time for yourself. Can’t carry all your gear? Get a photo van and outfit it with storage for all your equipment. Drive it to your shoots. Can’t carry all you need to a location? Workout hard to get strong enough to carry a huge backpack. Family taking up too much time? Cut them loose.

    How’s this working for you so far? Yeah, I thought so. Doesn’t work for me, either. We have choices we can make, but I can’t snap my fingers and wish up a life of luxury to feed my art desires.

    I guess we had better resolve to accept most of our constraints. They are there. They are real. We don’t have a magic wand to wave to make them go away. Sure you can adjust your life goals to better accommodate your art. But we will probably not have unlimited money or time or equipment or travel opportunities. That’s life.

    So we have to deal with our constraints and work with them and still create our art.

    Turn it to your benefit

    In some types of self defense programs you are trained to use an attacker’s momentum against them. That is sort of what I am advocating. Our constraints seem to be working against us and limiting our freedom and ability. Use them for our good instead of fighting against them.

    Constraints can be a road block or a creativity enhancer. It is a matter of attitude. Don’t sit around moaning because there is a constraint in the way. Accept it as a challenge. Use it to rise to a new level.

    An example of constraints

    A story to illustrate. In 1974 a young upcoming director named Steven Spielberg was hired to direct a movie called Jaws. It was the first major motion picture to be actually filmed in the ocean. It turned out to be beset with problems. One of the producers later said if they had read the book twice, they would have not made the movie when they realized how difficult it would be.

    There are many interesting examples of constraints with this movie, but one in particular fascinates me. The mechanical sharks turned out to be a nightmare to make work. Even when they were working it took a team of 14 “puppeteers” to operate them. The sharks caused so many production problems that they had to be cut out of most of the first half of the movie. The result was that in the final product, the hidden presence of the shark, combined with John Williams brilliant music, built much more tension and drama than their original plan. The movie was a blockbuster hit and still viewed today.

    It was made better because of the constraints that had to be overcome. Spielberg later said of the difficulties that “The film went from a Japanese Saturday matinee horror flick to more of a Hitchcock, the less-you-see-the-more-you-get thriller.”

    Our constraints

    We may not be making a multi-million dollar movie, but we encounter constraints all the time in our every day lives. How we deal with them makes or breaks what we get.

    Maybe you can’t fit a photo safari to Iceland, Africa, New Zealand,… (fill in your blank) into your life or budget. Does that mean you should put up your camera and sulk and not take pictures? Of course not. Shoot where you are and what you find. The reality is you will have more insights on familiar areas than you do seeing a tourist spot for the first time. Learn to really see what is around you. Let your curiosity lead you to an attitude of awe about what you find.

    You’re a fine art photographer and you feel like you need to have a medium format system to shoot 100MPixels or more with great dynamic range. So you should sit and wait until you can afford to put $20,000 or more into a good medium format system? No. That is something you defined. Get out and work.

    Most fine art photographers I know do not shoot medium format, at least not exclusively. The fact that they do not shoot it exclusively means they recognize that it is not always required. They can do excellent and very salable work with their DSLR. It is more about vision and insight and technique than it is about technology.

    Do the best you can with what you have. Maybe someday you can upgrade, but that will not change your vision or your style. It will just make your images printable at a larger size.

    I could use many other examples of constraints. Many are common to most of us and some are unique to each of us individually. Whatever yours is, embrace it and work with it.

    Become a problem solver

    Embrace it? Yes. You have to live with it, so use it to your benefit.

    Working around constraints is a problem solving exercise. We have to think. We use our creativity to come up with an even better solution to what we wanted to do originally. Like Spielberg in Jaws.

    Looking to shoot a scene, but it would take a super telephoto that you don’t have? Re-evaluate your composition. Maybe there is a different POV that you can shoot with your 200mm. Or get up and move closer.

    Working on a composition that requires a super wide angle to bring in all the lines and shapes you envision? Re-think how to make the image using your 24mm. Maybe get closer. Maybe re-compose it to change the relationship of the elements.

    This is a significant part of creativity. Creativity is not just coming up with wild new ideas that no one else has ever thought of. A lot of it is solving problems to remove obstacles in order to realize your work. Your vision should transcend your constraints.

    So when an obstacle or constraint presents itself, don’t let it derail you. Put your creativity to work on it. It can be a good thing. It can stretch you and grow you as an artist. Find a creative workaround. Let it spur you to produce something better than you originally envisioned. If you react to it positively and exercise your creativity, you may end up being thankful for the constraint.

  • When Do You Make a Picture?

    When Do You Make a Picture?

    When do you make a picture? Have you thought about that? On the surface, it seems an ambiguous or simplistic question. I have been asking myself this, though.

    Time, place?

    I could be flippant and say I make pictures Tuesdays in the canyons west of my home. That is not true, though. I capture images at least 5 days a week, in general. And I make pictures most places I go. There is no special place for making images.

    Looking for things to satisfy my curiosity is not about a time or place. Even traveling to an “exceptional” destination is a special case of just making images wherever I am, of whatever interests me, whenever I have a chance.

    The click

    OK, so you could say I make a picture whenever I click the shutter of the camera. While it is true that the shutter release is the event that causes the recording of the data in front of the lens, I have written before about sometimes needing to think about and process the data before I am done.

    When I go out shooting and come back with 200 images on my memory card, does that mean I have made 200 “pictures”? No, but it is a subtle semantic distinction. My answer would be that I have 200 new possible pictures at this point. However, I am going to go through them, cull out the defective ones, decide which of the duplicates I want to keep, and then try to decide if there is any merit in the ones that are left.

    When all is done, maybe I would end up with 0-10 that are worth doing something with. Your mileage may vary. Mine does, too, depending on time and place and my mood. Note that I still have to do things with them. In my mind, they are not “pictures” yet, since I am not ready to show them to anyone.

    Post processing

    So, of course I have to post process the ones I have kept so far. This may only involve simple exposure processing, especially corralling highlights and shadows, color correction, and contrast adjustment. Typically there may be some spotting and minor blemish removal.

    At this point I “may” have a picture. For straightforward scenes, this may be enough. I am done. It may be beautiful or interesting and no more than the literal scene before the camera. A lot of pictures are just that.

    Deciding what it is and it is going to be

    But not always. Sometimes an image is trying to tell me that it is something more. It may take a while for me to hear it. This often manifests as a discomfort I can’t quite identify. A suspicion that I am missing something.

    When this happens during the initial culling process, I usually keep the frames I am struggling with. I might not be able to articulate why, but I know I’m not ready to eliminate them yet.

    Even after the image is processed and is a nice picture on its own, sometimes it keeps trying to talk to me. Deep down inside, I know I have not understood or brought out all it means to me.

    Sometimes I realize I have been capturing images of a certain subject or mood. I may recognize a theme that is emerging. Recognizing it helps me identify and clarify a truth I was not consciously aware of. This could put me on track to follow the idea for a while as a project. With these nagging images in context, I learn more about why they were talking to me. All seems different. Sometimes I don’t even need to modify the images more. Just understanding what I was feeling may be enough.

    Combining

    And sometimes I recognize an image is an interesting piece, but not complete in itself. I will often file these away as raw material, expecting to revisit it is the future and decide what it needs to say what it wants to say.

    There are times when it comes to me and I know that these pieces have to fit together in a certain way to create a new image. This can be satisfying, fulfilling, exciting. It is a true creative journey.

    It is time consuming but often very rewarding to spend sessions in Photoshop playing with various combinations of pieces and parts, doing “what if?” games. These often end up in “failure”. Failure in the sense that I did not create a new picture. But it is seldom actually failure because I explored ideas and tested new things. It often sparks new ideas for the future.

    Disconnected from capture

    This comes around to an idea I have presented before. Sometimes I have to let an image age before it becomes whole. It can take me an indeterminate time to recognize what the image wants or needs to be.

    Images are raw material until I become comfortable with how they should be expressed and presented. This is a separate creative process from image capture and a necessary part of how I make a picture. It is not until the end of this journey that I feel I have a picture to share with the world.

    Today’s image

    The image with this article is a minor example of what I describe. I was fortunate to find this scene late one winter afternoon in what I considered an unlikely place in the back country of northern Oklahoma. I’m a sucker for lone bare trees silhouetted against the sky.

    I liked it, but I know it was not “done”. A few months later I added the birds, because I felt they built and reinforced the mood of the image and added some dynamic interest. Just today when I came back to it again after about another 6 months, I saw I wanted to eliminate some distracting foreground elements, crop it to emphasize the sky, and make it overall higher contrast and more saturated. I’m good with it – for now. 🙂

  • Apples or Oranges

    Apples or Oranges

    If you’ve taken a personality test, it probably showed you to be either rational or emotional. This may be true for most people, but you are an artist. This notion of your personality being a binary, either/or relationship probably presents a false dichotomy. It is based on built in assumptions that go back many years. People are not such a simple thing where you can label or classify them easily into rational or emotional, apples or oranges.

    Basis

    People have been trying to figure out human behavior, well, as long as there have been humans. There was a flurry of activity in the late Nineteenth and early Twentieth century time period. Two prominent psychoanalysts of the time were Carl Jung and Sigmund Freud.

    I won’t attempt to go into their beliefs. It is too deep and depressing and actually not that useful. One outgrowth of Jung’s theories, though, that has become ingrained in our culture is a model of personality theory.

    Jung postulated that there are patterns of personality common to most people. Many personality tests have been developed. You may have taken one or more of them. They can seem very insightful, but in the same way a horoscope can seem to predict events or behavior. We tend to believe what we are told from an “authority”. I do not recommend you bother with any of the tests.

    Anyway, one part of Jung’s theories is that people’s personality tends to be rational or emotional.

    Only choice?

    What I observe is that people are complex creatures. A simple model can predict some behavior of large populations of people, but is too simple to say much about an individual. Each individual has innate tendencies, but they are also modified by past experience, beliefs, education, circumstances, age, and a host of other factors.

    And we have this annoying habit of jumping around all over the map at different times as far as our behavior seems to go. Let me use myself as an example. I have a rational mind trained by decades of engineering experience. I fit that mold well at the time. But I also have become intuitive and emotional. I follow my feelings and intuition first. Rational thought is generally used to analyze my intuitive decision and justify or reject it.

    Also, in another completely different dimension, I am very introverted. If we were together at a networking event there is a very good chance you wouldn’t know I was there, because I probably wouldn’t come talk to you. I’m too shy. Yet I have little trouble speaking in front of a large audience. I actually enjoy it and feel relaxed and welcome spontaneous discussion and questions. Weird. Complicated. Contradictory. But that is what people are.

    Artist viewpoint

    This is about artists, though. Let’s focus down on this strange group.

    I believe artists have to be both rational and emotional. At least if you are a photographer.

    Rationally, we have to know our tools and processes. We have to understand what we can and can’t do and how to use the technology to accomplish what we want. Using the equipment, both camera and computer, need to be second nature. No matter the actual complexity. As effortless as a painter using a brush.

    The rational mind also gives us purpose and continuity. We decide where we are going, what our goals are, and how to market our self. Without a conscious focus on these things, we will drift. Our rational side helps us work out composition, framing, exposure considerations, and lighting.

    But on the “soft” side, we have to understand our feelings and intentions. Why are we doing what we do? What experience are we trying to bring to our viewer? If we do not have strong feelings for our work how can we expect our viewers to? For most work, if we are not conveying strong emotions, it will fall flat.

    Those of us who are naturally rational may have trouble with this. But it is possible to bend, to learn, to open up. We have to.

    It’s a balance

    The trick for artists is that we have to balance these two sides. Most non-artists can get away with not having to do that as much. Think of your stereotype of an accountant. Cold, objective, numbers person? Unemotional?

    An artist needs balance. The rational side will decide what we are trying to do and what path we will follow to get there. It keeps us focused. Yet if we are totally rational our work will be static and dry. Precisely composed and technically perfect, but empty.

    Our feelings will bring us passion and emotion, love of the image. Our viewers will sense this. They want to feel what we were feeling when we created it. But if we live totally in our feelings we will drift. We will follow every whim that tweaks our interest at the moment. We could even become one of those self-indulgent stereotyped artists whose personal life is a mess, who can’t keep focus on any goals and neglect their family and friends and even personal care.

    Talking about that tendency to go too deep into the emotional side, Sean Tucker said:

    Our rational minds are the foil that serves to balance those tendencies. They allow us to go deep but stay tethered to something truer and more stable than our shifting moods. They allow us to make our way far into the maze, knowing that we still have a thread to follow back into the light when we are done.

    Sean Tucker, The Meaning in the Making

    I love this image of the rational mind providing a safe path back when we have run off too deep into the wilderness of our feelings. We need to explore this maze, but we need to be able to get out, too.

    Don’t be put in a box

    Never allow yourself to be defined into a box by other people. Always surprise them, and yourself. Do the unexpected. If someone labels you as something, understand that that is just their opinion. It does not make you into anything. Other people’s expectations should not define us. You do not have to be either an apple or an orange.

    Likewise, do not put yourself into a box. It limits your thinking. It artificially places bounds on what you can and can’t do. What thoughts you will allow yourself to even think. How much freedom you have to experiment.

    Always do new things and try new ideas. This self-limitation is an even more serious problem, because we do not think there is anything we can do about it. Be aware of it and fight it.

    When we feel trapped in one of these boxes, rather than accepting it we should ask “who put the box there” and “so what?” That is someone else’s box. If someone comes up to you on the street and draws a chalk box around you on the sidewalk and tells you you are in this box, just step out of it and keep going. Let them have their box. You don’t have to be in it.

    Balance

    I believe, as artists, we have to be both rational and emotional. I’m not trying to give a new personality theory. Are we exhibiting both conflicting traits at the same time or are we bouncing back and forth between them? Don’t know and don’t care. The results are all that matter to me.

    It doesn’t have to be either apples or oranges. That is letting someone else define the problem. We are walking a tightrope. If we get overbalanced too far one way or the other, we will fall off into the pit. We won’t like that and won’t be doing much satisfying art there. But we have to walk the tightrope. It is part of the artist calling.

    Today’s image

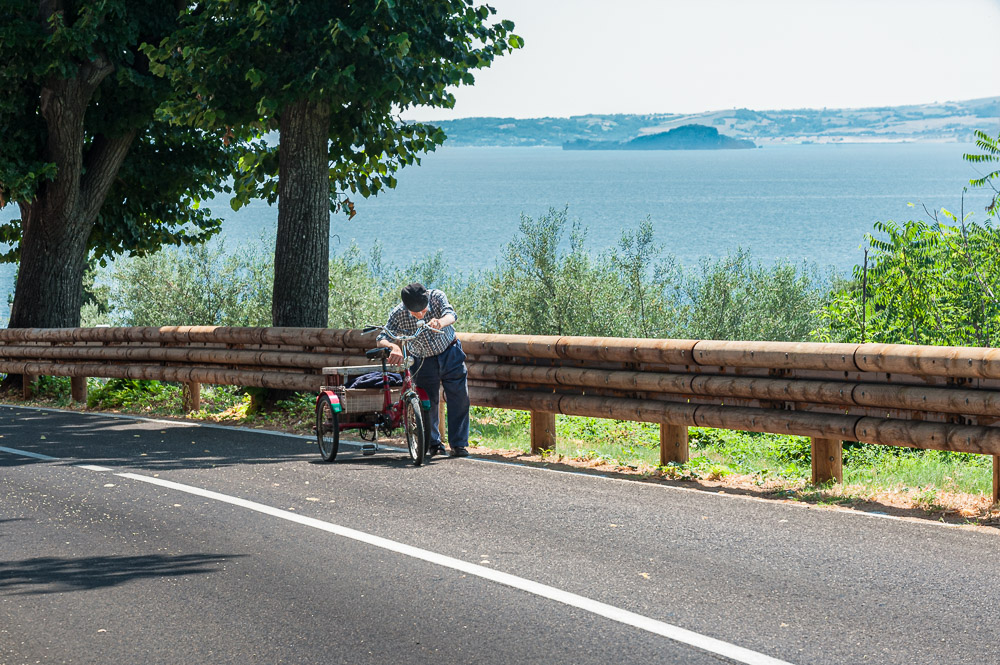
    The image above represents this tightrope. I took a brief time to get a reasonable composition, proper exposure, depth of field, balance of forms, etc. That was mostly instinctual. But mostly, I hope you get how I feel about the guy. And I hope it makes you feel something, too, and think about him. I have my story, influenced by the range of sights and emotions at the time. I’ll let you tell your own.

  • How Big Can I Print It?

    How Big Can I Print It?

    One of the things we have to wrestle with when we want to make a print is how big can I print this image and get good results? And how large should I print it? There is a lot of advice out there. Some of it is good.

    Film vs. Digital

    Virtually all images have to be scaled up for printing. The print you want to hang on your wall is many times larger than the sensor or piece of film you start from. Hardly any of us are shooting 8×10 negatives these days. Even if we are, we still usually want to make larger prints.

    The technology has changed completely from the film days. Enlargement used to be optical. By adjusting the enlarger lens and the distance from the film carrier to the print surface, the image was blown up to the desired size. If the lens is good, it faithfully magnifies everything, including grain and defects. If the lens is cheap, it enlarges and introduces distortion and blurring.

    Digital enlarging is a totally different process. A digital image is an array of pixels. My little printer at my studio likes to have 300 pixels/inch for optimum quality. So if I want to make an 8×10 print and I have at least 2400×3000 pixels, it will print at its best quality without changing a thing. Digital enlarging is a matter of changing the number of pixels.

    Digital enlarging

    But usually I want to print a larger size than the number of pixels I have. Here the digital technology gets interesting. And wonderful. Going back to my example, if I want to make a 16×20 print and maintain best quality, I would have to double the pixels in each dimension. It would have to go to 4800×6000 pixels.

    Photoshop has the ability to scale the number of pixels in your image. There are several algorithms, but the default, just called “Automatic”, usually does a great job. Here is the difference from film: software algorithms are used to intelligently “stretch” the pixels, preserving detail as much as possible and keeping smooth transitions looking good. Lightroom Classic has similar scaling for making a print, but it is automatically applied behind the scenes. Smoke and mirrors.

    The result is the ability to scale the image larger with good quality.

    Print technology

    In a recent article I discussed a little of how an inkjet printer makes great looking prints using discrete dots of ink. There are other technologies, such as dye sublimation or laser writing on photosensitive paper, but they are far less used these days.

    It should be obvious, but to make a really big print, you need a really big printer, at least in the short dimension of the print. Really big printers are really expensive and tricky to set up and use. That is why most of us send large prints out to a business that does this professionally.

    Why do I say the printer has to be big in the short dimension of the print? Past a certain size, most prints are done on roll feed printers. They have a large roll of paper in them. Say you have a printer that prints 44″ wide. The roll of paper is 44 inches wide and many feet long.

    We want to take our same 8×10 aspect ratio image and make a 44×55 inch print. If it was film, we would require an enlarger with at least a 44×55 inch bed and a cut sheet of paper that is 44×55 inch. But an inkjet printer prints a narrow strip at a time across the paper. The heads move across and print a narrow 44 inch long strip of the image, the printer moves the paper a little bit, and it prints another narrow strip. Continuing until it has printed the entire 55 inch length. Then the printer automatically cuts off the print.

    But if we naively follow the recommendations for optimum quality, we have to scale our poor little 2400×3000 pixel image up to 13200×16500 pixels. Even the best software algorithms may introduce objectionable artifacts at that magnification.

    Viewing distance

    Maybe we don’t have to blindly scale everything to 300 (or 360) pixels/inch.

    A key question is: at what distance will the image be viewed? Years of studies and observation led to the conclusion that people are most comfortable viewing an image at about 1.5 to 2 times the image diagonal length. This lets the natural angle of the human eye take in the whole image easily. For the example we have been using of the very large print, people would naturally choose to view it from about 105 to 140 inches.

    Along with the natural viewing distance there is the acuity of the human eye. I won’t get into detail, but the eye can resolve detail at about 1 arc minute of resolution (0.000290888 radians for the nerds). Simply, the further away something is, the less detail we can see.

    Going through the calculations, if our audience is viewing the large print from 1.5 times the diagonal, it only has to be printed at 33 ppi! Finer detail than that cannot be seen from that viewing distance.

    I have heard photographers who have images printed for billboards or the sides of a large building talk about inches/pixel. It would look like Lego blocks up close, but it looks sharp from where the viewer is.

    Nature of the image

    This is true unless the audience is photographers. They are going to get right up to the print, as close as their nose will allow, to see every blemish and defect. 🙂 But normal humans will view it from a distance.

    There are modifications to the pixels vs. viewing distance calculations depending on the nature of the image. If the image contains highly detailed structure it will encourage viewers to come closer to examine it. If the image is very low contrast, smooth gradations, it could be even lower resolution.

    Printing at the highest possible resolution that you can for the data you have is always a good idea.

    Your mileage may vary

    How big of a print can you make? It depends – don’t you get tired of hearing that? It is true, though. The real world is messy and simplistic “hacks” often don’t work well. It is better to understand things and know how to make a decision.

    When it comes down to it, these are great times for making prints, even large ones. My normal print service lists prints as large as 54×108 inches on their price list. I know even larger ones are possible.

    How big should you print? How big can you print?

    Conventional wisdom is that scaling the pixels 2x each dimension should usually be safe. My camera’s native size is 8256×5504 pixels. Scaling an image 2x would be 16512×11008 pixels. This would be a “perfect” quality print of 55×36 inches on a Canon printer. I have yet to need to print larger than that.

    Given the perceptive effects of visual acuity, I am confident I could create much larger prints. Larger than is even possible by current printers. And they would look good at a reasonable distance.

    A key question is who are you printing for? A photographer or engineer will be right up to the print with a magnifying glass looking at each pixel. Most reasonable people will want to stand back at a comfortable distance and appreciate the image as a whole. Who is your audience?

    Learn how to scale your image without artifacts and how to use print shapening to correct for problems. Know the perceptual effects of human visual acuity. This is part of the craftsmanship we have to learn in our trade. Given those tools, the rest is artistic judgment. With today’s equipment and careful technique and craftsmanship we can create wonderful results.

    Your mileage may vary.

    The image with this article is very small – 3 MPix. I would not have a problem making a 13×19 print of it. I doubt you could see the pixels.

    Have you tried to make large prints? How did it go? Let me know!

  • Pixels, PPI, DPI

    Pixels, PPI, DPI

    Pardon me, but sometimes the Engineer in me has to rant. I see so much confusion about pixels and how to scale them to an output size. Pixels are just an RGB dot. How they are presented is up to the output driver. It is complicated at a technical level, but it does not have to be complicated to us poor users. So let’s see what pixels and PPI (pixels per inch) and DPI (dots per inch) really mean mean.

    What are pixels?

    A digital file is just a rectangular array of pixels. The term “pixel” is a contraction of “picture element”. It is the smallest dot the sensor can resolve or the smallest point of light a display can produce.

    Getting to the array of pixels is complicated, since camera sensors don’t read them directly. See my article “How We Get Color Images“. Regardless of what magic actually happens, by the time you view an image on your computer monitor, it is an array of pixels. Conceptually each pixel is represented as a triplet of (Red value, Green value, Blue value). Each of the values is a number from 8 to 16 bits in size. So each value has a magnitude of 0 to 255 or 0 to 65536. What sizes you actually have is determined by the capability of your sensor (the dynamic range) and camera and the color space you are using.

    Pixels have no physical meaning. In the main camera I use, the array is 8256 x 5504 pixels. Again, it is just a number. It has no physical meaning. It has no relation by itself to a print size or the size of the image on screen.

    What PPI should I use for display?

    This is the thing that annoys me the most. I constantly see museum and gallery directors put out requirement that we have to send in electronic samples sized to 72 PPI. PPI stands for pixels per inch.

    Way back in the dim distant past, computers only did text. Then Apple came along and wanted to do graphics. They did research and decided 72 PPI looked good on screen. This set the standard, but hasn’t been the case for eons of computer age. The display on my fairly old iMac is about 218 PPI, physically. But the magic 72 PPI stuck with a lot of people.

    The increases in PPI density and bit depth and speed of monitors is one of the great technological advances of computers in recent years. All those pixels on screen makes for very sharp and smooth images. We can see so much more.

    Worse, many people have been led to believe that the PPI sizing of the image files means something. It doesn’t anymore. Actually, it never did for images displayed on screen. The PPI setting has little or no meaning for an image displayed on screen.

    Try it

    Try an experiment: take an arbitrary, fairly large jpg file of your choosing. Let’s say the filename is MyFile.jpg. Load it into Photoshop and resize, WITHOUT RESCALING, to 72 PPI. Save it as MyFile-72.jpg. Now reload the original file.jpg and size it to 360 PPI. Again without rescaling. Save it as MyFile-360.jpg. Rescaling changes the number of pixels in the file. We just want to change the PPI setting. These 2 files now have the same number of pixels but different ppi scaling.

    Now use whatever image preview application you like and view the 2 sized files. Is one of them 5 times larger than the other? On my system, they are exactly the same size on screen. Even though one is set to be 72 PPI and one is 360 PPI. They are displayed as the same size and the same resolution.

    Why is this? Because the file PPI setting means nothing. The display app just looks at the number of pixels and decides how large it is going to make it. If it is a tiny image, say 300×200 pixels, it will probably make it very small to avoid pixelization artifacts when an image is enlarged too much. It it is a reasonable sized file, it will just pick a good output size. It makes these choices based on the number of pixels. If the image is in a web page, the web page code determines the size the image will be.

    What PPI should I use for print?

    Now we head into an even more confusing area, and here the confusion is somewhat justified. Printing is it’s own special world. The technology and perception is very different from displays. Displays emit light. Prints reflect light. The effect to the viewer is very different.

    Printers don’t have pixels. Instead, we refer to the output scaling as DPI – dots per inch. This recognizes that we are now talking about physical marks on paper (or your substrate of choice).

    The printer manufacturers have created tremendous confusion in customer’s minds because they overload terms. The Canon Pro-1000 printer I have at my studio has a specified print resolution of 2400 DPI horizontally and 1200 DPI vertically. Yet the optimum print resolution is 300 DPI. That is, when I am creating a print, I should try to set the output resolution to 300 DPI. This is bound to confuse most people. Why not set the output to 2400 dpi for maximum resolution?

    How inkjet printers make nice prints

    We come to one of the secrets of printers. We customers want prints with crisp lines and smooth gradations of color and tone. As natural as film used to be, or as smooth as the original artwork we are copying. An inkjet printer sprays dots of ink onto the paper. A dot or no dot. At the level of a single dot, this is not smooth. Inkjet inks do not “mix” to create new colors.

    So take my Canon printer as an example. Each “dot” (at 300 per inch) is actually subdivided into an 8×4 grid – 8*300 is 2400 dots per inch horizontally. Any position in this 8×4 sub-grid can contain any combination of printer dots of any of the 12 colors. The print driver uses a magical algorithm called “error diffusion” to cover the sub-grid with a blend of printer dots of the available colors that simulate the color and intensity of the pixel to be printed there.

    It is mind bending in it’s complexity. One reason they don’t talk about it much is that it is proprietary for each manufacturer and printer, a closely kept trade secret. The good news is that they take over this complexity so we don’t have to. And they do a very good job. So I set my image to print at 300 DPI and magic happens.

    It usually doesn’t matter

    In summary, PPI settings do not matter for images displayed on your monitor or on the web or sent to your social media account. If someone tells you they need their images scaled to 72 PPI, just smile and do it, but secretly know they do not know what they are talking about. Only the total number of pixels affects the size of the image. And without going into mind numbing detail, I hope this takes a little mystery out of the way printing works.

    I feel better now. 🙂 How about you? Are you more or less confused?