An artists journey

Category: Technology

Ideas about the mechanics, techniques, and technology behind image making.

  • Moving Past Perfection

    Moving Past Perfection

    Photography is a rather technical art form and most photographers get caught up in the gear and techniques. This can be appropriate for some work, but not always. I have stopped worrying about the last line/mm of resolution and absolutely perfect focusing and steadiness. It can be that imperfections can make some images better. I am moving past perfection as a goal.

    Perfection

    Sure, I love technical perfection. I think at some level most photographers do. It is a characteristic of what we can capture. We don’t want to just take a picture of a bird. We want to resolve every detail of every feather. The texture in an image should be so present that the viewer can easily imagine what it feels like. Every part of the subject must be in crisp focus and highly detailed.

    Technical perfection like this is a form of craftsmanship. It shows our viewer that we know how to use our tools and that we can check the craft boxes to prove our work is worthy.

    But this craftsmanship is a table stake, to use a business term. A table stake is the minimum viable offer that will be considered. For example, if you are buying a new car, you would not consider one that does not have a backup camera. It used to be a luxury but it has become an expected necessity. In the same way, digital photography has improved our product so much that there is little room for imperfection. Technical perfection, where is is required, is a necessity to be considered a salable print.

    Unless it is deliberate imperfection. More on that later.

    Don’t let it become the reason for the image

    An overused quote (at least, I seem to overuse it, because I believe it is very insightful) is Ansel Adam’s comment that “There’s nothing worse than a sharp image of a fuzzy concept.”

    I take that to mean that a good image will not be a great image solely because of its technical perfection. Instead, the technical details must serve the mood and intent of the image. Sometimes that means the technical details must be front and center, because they provide the framework that supports the resulting image. But in other cases they may actually subtract from the artist’s intent.

    I keep talking about sharpness, but the same applies to any other technical details. Composition does not make an image. There has to be more there. The absolute peak time and weather conditions at a certain location may help you make a very good image, but by themselves will not guarantee it.

    Who defines perfection?

    But what is “perfection”? That is very difficult. Must every image be 50MPixels or more at 3000 line pairs/mm resolution? Does every picture have to be perfectly aligned with “rule of thirds” lines and points? Does the color balance of the print have to exactly replicate the color of the original scene? How about images that do not have a definite foreground/middle ground/background? And how about the ones where the histogram is just wrong, say pushed too far to the left or right?

    Do these things define perfection? Can we make a great image that violates some or all of these “rules”? If you are thinking about some other articles I have written, you will know that the answer, for me, is there are no rules. There is no authority with the right to define what characteristics my image must have.

    If I have defined for myself that I am doing things in an Ansel Adams style, then that puts me in a box and defines certain expectations of look and sharpness. Or if I have defined that I am doing portrait photography in the style of Richard Avedon, that sets expectations of subject matter and style and print sizes.

    But notice that these are self imposed limitations. I reserve the right to define for myself the nature of perfection for my images. It may or may not include technical perfection.

    How can an “imperfect” image be good?

    If I set the definition of perfection for my images, then what does imperfect mean? It will only be imperfect if I fail to achieve the result I want.

    Think of some of the great shots of photojournalism or street photography. Some of them are a little our of focus. They might be over or under exposed. They might be grainy. But they captured a moment, an emotion, a comment on the human condition that completely overwhelmed all technical considerations. They are great despite their imperfections. Maybe because of them.

    I love (and was infuriated by) the types of comments I used to hear in camera club competitions. A judge might say “the composition would be improved if the photographer had taken 2 steps left”. I appreciate your feed back, but if I had moved left even 1 foot further I would have been over the edge of a cliff. Thank you, I will live with the composition I could get. It works, despite your sincere attempt to improve it.

    Past perfection

    So what do I mean by moving past perfection? For me it is the realization that perfection is not the highest goal. An image can be excellent even if there are technical flaws. Other things can and often are more important. The recording a “perfect” moment that exactly captures the nature and personality and essence of the subject can make a great image, even if there are imperfections.

    Actually, I am finding a lot of my current work is intentionally “imperfect”. I often use camera motion or subject motion as a design element. Some entire projects do not have a single sharp pixel in them. That is what I want, so I am pleased with it.

    A different take on craftsmanship is being able to use your medium to achieve your goals. Would you rather follow your own goals and create work that pleases you or struggle to achieve someone else’s ideal of perfection?

    Judge by your expectations

    No one except you can judge the perfection of your work. The definition of perfection is yours and yours only. They might say they would like it better if it was sharper or more/less colorful, or more/less saturated, of brighter/darker, or composed differently, or if the mid tone contrast was enhanced/reduced. And they may be “right”, in the sense that, after you think about it you decide yes, if I were shooting it again I would change it somewhat.

    But it is you changing your expectations that causes the difference in evaluation. No one else is in a position of judging your work unless you allow them to.
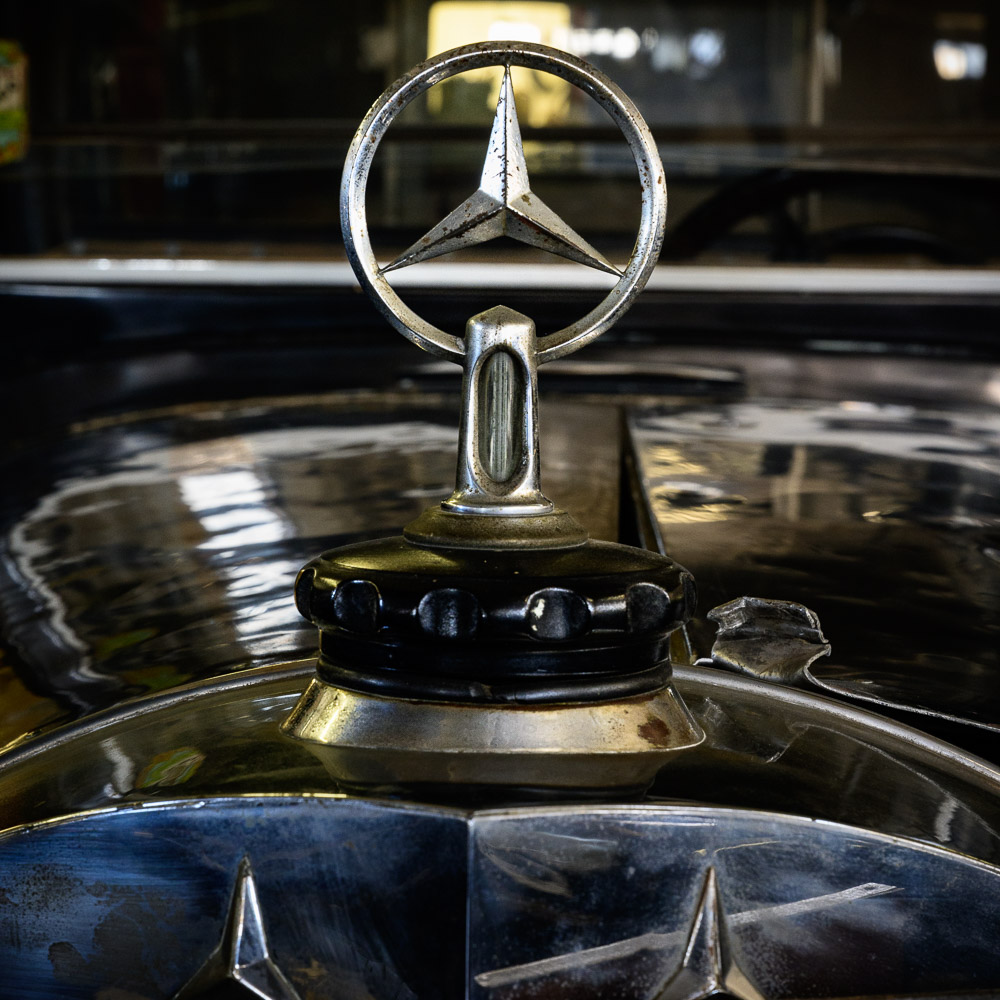
    Today’s image

    This is a horribly imperfect image. And it is just what I wanted. 🙂 It was shot out of a fast train in France. I wanted to represent the sense of speed and motion and changing terrain whipping by. There is not a single sharp pixel in the frame. The focus may not be right, I can’t tell. But this was one of the best of many, many tries, and to me, it captures what I was perceiving.

  • Depth of Field

    Depth of Field

    In a previous post I said I would talk about this later. Here it is. I believe most photographers only vaguely understand what depth of field (DOF) means. That’s probably OK, as long as we can still use it to our advantage. You don’t have to know in detail how your car works to be able to drive it, but it helps.

    What is it?

    You have seen it. We focus on a subject, but when we look at the image we are disappointed that another subject or the background was out of focus. We have been bitten by too little DOF.

    Depth of Field is the distance between the nearest and farthest points in the frame that are in acceptably sharp focus. OK, we can intuitively understand distance that is in focus. But what does “acceptably sharp” mean?

    The reality is that when your focus your super expensive, multi-element, rare earth material lens, it technically only focuses at exactly one point. Everything else is to some degree out of focus. But like many things in life, the precise details do not matter. What matters is the result.

    For most of us in most of our applications, it is OK for things to be a little bit out of theoretical sharp focus. We can’t really see that unless we magnify an image greatly.

    Circle of Confusion

    So for most of our work, we will accept a certain amount of out of focus as unnoticeable. The measure of this for Physicists and Optical Engineers is called the “circle of confusion“. If you focus on a point of light, you expect it to be imaged as a sharp point. But as one of these points gets in front of or behind the sharp focus plane it becomes a circle instead of a point. You have seen this as you adjust the focus point in a scene.

    The overly technical term “circle of confusion” refers to how large these circles are. And what we care about is how large they can get before we perceive them as out of focus. This picture helps illustrate that. The center diagram is focused precisely. The top one is focused slightly behind the focus point. The bottom one is slightly in front of the focus point.

    Circle of Confusion illustration

    Physics

    You probably don’t actually care about the math. But here is it:

    The approximate depth of field can be given by: {\displaystyle {\text{DOF}}\approx {\frac {2u^{2}Nc}{f^{2}}}}

    for a given maximum acceptable circle of confusion (c), focal length (f), f-number (N), and distance to subject (u).

    This is precise, but not helpful. There are DOF calculators available, but most of us will not use them when we’re out shooting. I never would, and I even understand the math. 🙂

    What does it really mean?

    It means that if we want to maximize the apparent range of sharpness in a scene to our advantage, we need to understand some basic things about our cameras and how to adjust them for the results we want. None of it is magic and we do not need to become mathematicians.

    Controlling the DOF becomes just another of the design choices we make more of less automatically as we set up a picture. When we become familiar with the concept it gets to be an easy thing to take in consideration.

    How do you control it?

    If you unpack the equation above you discover that there are are really only three things to juggle: focal length, aperture, and distance to the subject. I take circle of confusion as a relative constant, since we don’t usually think about it while we are shooting.

    Normally we consider the aperture to be our main control of DOF. That is because it is the easiest one to adjust. You have discovered or been taught that a wide aperture (small f/ number) gives a shallow DOF and a small aperture (large f/ number) gives the most DOF. This is true, as far as it goes.

    But there are 2 other components to the equation. We also affect DOF by our lens focal length choice and by our distance from the subject.

    For any given lens, the closer we are to the subject, the shallower the DOF is. Telephoto lenses exaggerate the effect more than wide angles. Increasing the focal length reduces the DOF. And getting further from the subject greatly increases the DOF. Looking back to the formula briefly, notice that the focal length and distance to the subject are both squared. This means they are a much stronger influence than the aperture.

    Aperture, focal length, and distance to the subject all work together to determine the DOF A smaller aperture (larger f/ number) increases it. Moving further from the subject increases it a lot. Using longer focal length lenses decreases it a lot.

    It is said that wide angle lenses have greater DOF

    Conventional wisdom is that wide angle lenses have more DOF than telephoto lenses. Actually, no. But practically, yes.

    The discrepancy is how we tend to use them. We shoot with a long lens and decide there is not enough DOF. So we put on a wide lens and shoot the scene from the same position. DOF increases a lot. But the field of view has also expanded, so we have a much wider shot. If you were to walk up to the subject to make the image size field the same as before, the DOF would be the same. Thank you physics.

    But in practice, yes, using a wide angle lens usually gives us a great DOF because we usually shoot from relatively far away.

    Hyperfocal distance

    One “trick” that has been used for a long time and that simplifies getting maximum DOF is to know about hyperfocal distance. The hyperfocal distance is an optimum point where everything from infinity to a point near the camera is in acceptable focus. Seems too good to be true, but it is just physics again.

    The technique is getting harder to determine now and is probably falling into disuse. Way back we tended to shoot prime (non-zoom) lenses and they had focusing scales. For a given aperture, all you had to do was adjust the lens so the distant aperture number was at infinity. You were now focused at the hyperfocal distance. Everything from the near focus scale mark to infinity is in acceptable focus. It was easy and very useful.

    Now, though, zoom lenses have gotten very good and most of us use them. The problem is that they are optically complex and do not focus the same. They cannot, by their design, provide us with focus scales.

    What to do? A pretty good solution is called the double the distance method. There is some estimating (e.g. guessing) and approximations involved, but it is better than a lot of alternatives.

    Say you want to have a flower about 5 feet away in focus and have everything in focus all the way to infinity. Focus at about 10 feet. Choose a “suitable” aperture, probably around f/11 to f/16. I told you there was guessing. But by doing this, the field from about 5 feet to about infinity will be sharp. Check it in your viewfinder. Adjust if necessary. The hyperfocal point is about 1/3 of the way from the closest point you want sharp to infinity. You have to estimate it.

    Making some educated guesses based on knowledge of what’s going on is better than a random guess based on no knowledge.

    Just do it

    Photography and video production are probably the most technical of the arts. We are constrained by the physics of the sensors and materials, the properties of the optical systems and lens design, and the effects that can be created by these. Compounding these is the reality that we are typically imaging real subjects with all their flaws and constraints. It’s wonderful!

    Don’t get caught up in the math or the technical details unless you are a nerd that really likes that. It is seldom necessary for making good photographs. I just put the DOF formula in to show you it is based on science, not some mystical mumbo jumbo. I would never use it in the field.

    Learn that depth of field is a balance between the aperture, the lens focal length, and the distance to the subject. Experiment with them. Get a feel of how they relate and practice getting the results you want. It is harder to describe than it is to do.

    Today’s image

    This image demonstrates intentional shallow depth of field. I wanted the foreground and background definitely blurred, but still recognizable. The effect was achieved with a moderate aperture, f/11, and a short telephoto of 70mm close to the subject. Remember, increasing the focal length and decreasing the subject distance both strongly reduce DOF.

    Experiment more. Make the use of your equipment to achieve your intentions automatic.

  • Limiting File Size

    Limiting File Size

    In a previous article I talked about the “bloat” that happens when we edit in Photoshop. Is there anything we can do about it? Should we be concerned about limiting file size?

    RAW vs Tiff

    RAW files are fundamentally different from Photoshop files. A RAW file captures and preserves the data directly from the camera sensor. This data still contains the artifacts from the Bayer filter technology, that is, each pixel represents 1 value of red, green, or blue. Data in this form cannot be shown on your computer monitor until it is processed and expanded by a RAW converter like Lightroom Classic.

    It is very important to realize that this data is unaltered, no matter what fancy processing you do in your RAW editor. The adjustments you make are kept as a collection of “processing instructions”. These are applied in real time whenever you view your RAW file.

    Because of this design, Lightroom can only change the look of pixels. It cannot in any way add or remove or alter individual pixels. No matter what it looks like on screen.

    For instance, even if you use the Healing tool to completely remove a person or object from the picture, the original data is always still there. What it saves is instructions telling it what region to select and what region to copy from. This processing is applied, again, each time you view the image in the editor. Actually, it usually just keeps an edited preview of the image to show quickly, but that is getting too deep.

    Photoshop manipulates pixels

    Photoshop, though, is the heavy duty pixel pusher. It has no moral imperative to prevent you from doing anything to image data. You can freely add or remove or alter or stretch or shrink or copy over anything. Unless you take steps to edit non-destructively (more on that later), you can remove something from the image by simply copying other pixels over the area you want to remove. The original data is permanently gone. Photoshop doesn’t care.

    To do this level of manipulation requires Photoshop to expand the original RAW data to a pixel structure. The pixel data has 3 values, red, green, and blue, for each pixel and each of the values is probably 16 bits if you are editing in one of the “safer” color spaces. I recommend it. This expansion automatically makes Photoshop’s file size at least 3 times larger than the RAW file.

    Once the file has been expanded to pixels and edited, there is no going back. It cannot be reprocessed back into a RAW file. You can’t put the genie back into the bottle.

    Even RAW files can get big

    I am presenting this in a rather black & white (metaphorically) contrast. RAW file editing is no longer immune from growing quite large. The “culprit” is masks.

    It used to be that RAW processing was rather coarse and simple. If I adjusted the exposure of the image it applied to the entire image. And the processing instruction was small and simple. This is the literal data that is saved for that adjustment:

    crs:Exposure2012=”+0.65″

    Don’t worry about the exact meaning of all of it, That is for the Engineers. The point is that only these literal 24 characters are stored to change the exposure of the entire image.

    But then the designers at Adobe and others created very useful and necessary magic. We can mask areas and selectively adjust them! This is an awesome and very welcome change. It pushes back the boundary where we have to go to Photoshop to finish our files. These masks and edits are stored as text with the other processing instructions. As you might guess, it can get large.

    After doing a lot of masking and editing I have seen some of these “sidecar” files grow into 10 megabytes or more. So if my original RAW file is 50 MBytes and the editing instructions add another 20 MBytes, that is quite a lot bigger. Still nothing like going to Photoshop, but I needed to point out that RAW processing is not entirely free.

    Non-destructive editing

    Please give me a moment to plug a non-destructive editing style in Photoshop. Photoshop can do amazing and totally un-undoable things. I know that I often change my mind or have new insights about an image after it ages a while. So weeks of months or more after an initial edit, I may look at an image again and see a different direction to be taken. If the Photoshop edit has gone down a path of no return, this can be hard.

    Sure, I could go all the way back to the original RAW file and start over, but this is usually not what I want to do. I don’t want to repeat the hours of detailed work I already did. Typically there was a branch, a fork in the road while I was editing. I chose one path and later I decide I would like to explore the other one.

    With discipline, Photoshop edits can be almost totally non-destructive. This means you can undo any decision later. Or perhaps strengthen or reduce the effects of an edit.

    Probably 2 techniques serve for about 80% of the goal of non-destructive editing. The first is to use a new blank layer for pixel changing edits. So if I want to remove an element from the image, I will typically create a blank layer, then use stamp or move to overlay changes onto the image. the original information is still there is I later want to expose it or do a better job of removing it.

    The second powerful technique is adjustment layers. Use adjustment layers rather than doing adjustment directly to the image layers. This allows the adjustments to be changed in the future. It also allows for masking to limit the effects to selected areas.

    Steps to limit Photoshop file size

    It is a tradeoff: do all your processing in Lightroom or go into Photoshop. Adobe and others are constantly pushing out the boundary by giving us more and more power and capability in our RAW editors. This is very welcome.

    But there comes a point when we may have to do things Lightroom cannot do. There are things we can do to limit the overall Photoshop growth to the minimum, about 3 times the original RAW size. Basically, these destroy the non-destructive edits I recommended before. So all of those edit layers can be flattened down before saving the file.

    This commits the edits permanently. They can’t be undone in the future. But the file size will be smaller. And rasterizing smart layers will save a lot of space. Also making changes permanent.

    If it sounds like I am negative on doing this, I am. Once I invest a lot of time editing an image in Photoshop it becomes the “master” image. I usually want to keep the freedom to change my mind.

    Why bother?

    Maybe it’s the wrong attitude, but I try to act as if the file size does not matter. A large file is just a price to pay for the ability to craft an image I am pleased with. Disks are relatively cheap.

    It’s a pain when I out grow the 4GByte limit for Tiff files and have to go to a .psb file. Lightroom does a bad job of the user experience. But I put up with it because I want to hold all that work in an editable state.

    So officially my attitude is “why bother?”. Don’t sweat the file size growth. You went to Photoshop for a reason. Use it. Do your work. Files get large, It’s just a cost of doing business.

    Today’s image

    This is an example of a very simple looking file that grew dramatically. The final Photoshop file is 22 times larger than the edited RAW file!. From 61.5 MBytes to 1.34 GBytes. It sure doesn’t look that complex. It was necessary and I would still do it the same way again.

  • So Big!

    So Big!

    Our modern cameras have lots of pixels. This is a great benefit for us, especially if we want to make large prints. But sometimes the files we are editing can get so big we have trouble dealing with them. Why is that?

    Sensors

    I have made the point before that our modern sensors are amazing. The camera I shoot captures 47 MPixels for each shot. That’s 47 million pixels. There are sensors that go up to 150 MPixels in some medium format camera bodies. I haven’t seen the need to move to that yet.

    Why do we need so many pixels? Some will state that we don’t. That it is just pixel envy that keeps us seeking more. There is a good argument that about 20 MPixels is enough for the vast majority of applications.

    That is for you to decide for your own needs and preferences. I can state that I believe the quality of our images has moved far beyond film days. Digital images produce the sharpest, most detailed, most colorful, most editable results that have ever been possible, except in some very niche applications. There is no going back.

    Raw files

    Raw files hold the information that comes directly off the camera sensor. There is minimal processing done. I have discussed Bayer filters and how we get color images. The Raw file is not really an image we can look at yet.

    But there are some great features of raw files we need to be aware of. First, this is the closest we can get to the exact data that was captured by the sensor. Little processing has been done. All the processing and interpretation of the resulting image is ours. Among other reasons, this is a reason to always shoot raw instead of jpg files.

    Second, the nature of the raw file is that it cannot be edited. The original data is always preserved. Yes, of course, I can go into Lightroom Classic (I will always call it just Lightroom from here on) and do amazing things to the image. All of the changes are saved as what are termed “processing instructions“. The original data is never altered. It cannot be altered.

    One of the things this means is that years from now when I have new tools or change my mind about how I want the image to look, I can go back and re-edit it. I can even reset to the original captured bits and start over. No data is ever lost. This is a great things.

    And thirdly, the raw file is relatively compact. My camera captures 47 million 14 bit resolution sensor values, each either a red or green or blue data. It is not yet “demosaiced” to expand the Bayer sensor data to full color data for each pixel. In addition certain meta data values are stored in the raw data. Things like the camera and lens information, capture time, my copyright information, etc.

    Raw file size

    My camera is set to do a lossless compression of the data before saving it. So no data is ever lost in the process. Looking at a randomly selected file I just shot, its file size is 58.08 MBytes on my file system. The size of my raw images varies because of the amount of lossless compression that can be done on each image.

    But think about this a minute. I captured 47 million 14 bit images. This should have been 94 MBytes of data, not counting the extra meta data. I am assuming they store the 14 bits in 2 8 bit bytes. I don’t know if that is true. This means the saved raw file is even smaller than the data that came off the sensor. As I edit it and add processing instructions, the file gets somewhat larger, but seldom huge.

    Photoshop bloat

    Now I sent this raw file to Photoshop and immediately saved it. No editing. The file size is 229.16 MBytes! It is about 4 times larger! And I didn’t even do anything to the image! Why is this?

    Well, Photoshop edits pixels, each a triple of (red, green, blue) values for each pixel. Photoshop expands the Bayer data to the flat grid Photoshop needs, This is what Photoshop works with and what is saved. That automatically makes the file at least 3 times its original size. The raw file was compressed, that probably accounts for the difference.

    Now to illustrate more of what Photoshop does, I added a blank layer and used the spot healing brush to correct a couple of blemishes, very little. Saving the file again grows the file size to 548.08 MBytes! It doubled!

    To continue the demonstration, I added a curves adjustment layer and saved the file again. Now the size is 632.72 MBytes.

    The difference

    It is clear that LIghtroom and Photoshop show very different behavior when editing images. This is because of their nature and design.

    Lightroom is called a parametric editor. It does not modify the image data, Rather, it keeps a list of processing instructions to tell how to change the look of the image when it is viewed.

    Photoshop is a pixel editor. It can add/delete/modify pixels at the most detailed level. You have to be careful that you do not lose the original data. It does not care. It will do any amount of change you request. And it has the power of layers to build of levels of modification. This can lead to huge file sizes.

    Did you know that there are maximum file sizes for Photoshop files? Standard Photoshop psd files can only be up to 2 GBytes in size. Tiff files can only be 4 GBytes. I exceed these limits a lot. The only choice then is to switch to Photoshop’s “big” file type, the psb. It can grow much larger. Actually, it can handle us up to 4.2 Billion GBytes. That will work for a while. 🙂 Unfortunately it is not a choice to automatically use it.

    Any solution?

    Well, there is the “if it hurts don’t do that” solution. Stay in Lightroom for most of your image processing. Only go to Photoshop for situations that Lightroom cannot handle. This is a good strategy and I use it.

    But if you have to do that detailed pixel grooming and you have to use many layers to process your image to your taste, accept it. The cost is much more powerful computers and larger and faster hard drives. I have both. It is a cost of doing business the way I want.

    Editing large files in Photoshop will lead to very large files on your disk. I have a lot of multi GByte files. That is, some of my files have grown to about 100 times the original captured file size! Ouch. I can’t do this routinely. It has to be for special images that are worth the time and file size to do this.

    When you have to call out the big power tool, Photoshop can do almost anything. But the cost can be high.

  • Purity in Photography 2

    Purity in Photography 2

    Because of its nature of recording the scene in front of the camera, people assume that photography is some kind of “pure” imaging form. That is, that what you see is reality. I take opportunities when I can to dispel this myth. Never assume purity in photography unless it is explicitly presented as such. This is a theme that just won’t go away.

    Recording

    Our excellent digital sensors do a pretty good job of reproducing what the lens images onto their surface. For good and bad. Because of this, some people assume that photographs represent exactly what was captured.

    This is just an assumption that in no way restricts me in my art. And it does not restrict anyone else unless they make the explicit determination to not do any manipulation. What the sensor records is often just a starting point in my photographic vision. Not an end point.

    It is so easy now to alter images that you should always assume it has been done.

    Manipulating

    From nearly its beginning, artists have manipulated photographs. Black and white film photographers quickly invented ways to alter their images. Sometimes these were done to overcome limitations with the technology of the time. Sometimes to correct or improve the images, for instance by “spotting” defects and removing distracting objects. More and more commonly alterations were done for artistic improvements.

    For fun sometime look up a “straight” print of Ansel Adam’s famous Moonrise, Hernandez, New Mexico compared to one of his later interpretations. The later is almost unrecognizable as the original. Does that mean there is something false about the later prints? No, it is considered one of the great examples in the history of photography. The artist chose to alter it heavily to make it appear as he wanted it to look.

    It is never safe to assume that a photograph exactly represents reality.

    What is truth?

    Is a photograph “truth”? Is it some form of purity? Why? What makes you assume it is?

    The technology of its capture process leads some people to assume a purity or truth that may lead you astray. Yes, the sensor recorded all the light falling onto its surface, but there is still a long journey from there to a finished image.

    Some might say that Photoshop eliminated truth. That is overstated, but not entirely false. The positive statement is that Photoshop enabled greater artistic expression. Photoshop and other image manipulation tools, along with powerful home computers and large disks, opened a new world of creativity to artists.

    Now most photographic artists do extensive manipulation of images. Photoshop, Lightroom Classic, Capture One, and other tools open new worlds of creativity to photographers. Photographers have always done this, but the modern tools add new power and possibilities.

    But this power is just a modern convenience. It has always been true that images are created in the artist’s imagination. A great example is Albert Bierstadt, a German painter who helped popularize the American west in the 19th Century. His paintings created a lot of interest, but they were often, let’s say, fanciful. For example his work Rocky Mountain Landscape does not depict any real scene I have ever found in the Rocky Mountains where I live.

    The artistic view is that an image is the expression of the artist’s vision and feeling for the image. It seems the truth comes from within rather than being a property of what is represented.

    What is the intent of an image?

    Does this manipulation make an image less “true”? That depends on the intent of the image.

    Maybe it seems obvious, but any image presented as truth must be true. If I see a picture in a news article that claims to show a certain event, it better be exactly that. If it is altered to manipulate the scene or misrepresent the event, that is false and the reporter and their organization should be severely censured.

    In my opinion no AI generated “news” or images can be presented as truth. They were generated by a machine rather than being a direct capture or observation of an event.

    Let’s go a little away from news and talk about a portrait. Must a portrait be a literal, completely truthful depiction of the subject? Well, they never have been. Portraits are always “retouched”, maybe altered extensively to hide blemishes. Perhaps to make the subject look slimmer or taller or a little more handsom. So a portrait should be a recognizable representation of the person, but do not assume it is literally true.

    But I live in the world of art. Art is fantasy and imagination and vision and creativity. We should never get confused that art is reality. I am free to do anything within my image that I think expresses my artistic vision. This makes Bierstadt’s Rocky Mountain Landscape acceptable art, even if not reality.

    Don’t waste your effort thinking photographs are always reality. Most do not even pretend to be anymore. Photographs are another artistic expression, unless explicitly presented as reality.

    Today’s image

    A high altitude aerial? Maybe. Maybe not. Since I have been talking about photographic art not being real, it might be best to assume this isn’t exactly what it seems.

    I won’t say more about it now. This is part of a series I am working on.