I have written a few times about how intent and expression are more important in a photograph than craftsmanship. I don’t want to leave the impression that craftsmanship is unimportant. It is critically important for a serious artist.
What is craft?
Craft is defined as skill at carrying out one’s work, or an activity involving skill in making things by hand. I believe an artist first has to be a craftsman. Proficient with his tools. Using our tools and equipment must be second nature.
Craftsmanship is usually a learned skill rather than an innate talent. Sure, some things are easier for some people than others, but it still has to be learned. Lots of investment of time and practice.
When we get skilled at the craft, the mechanics recedes into the background. It becomes a support and enabler for our artistic vision.
Perfection doesn’t make a picture
I have argued before that perfection of craft does not make a great image. The classic statement is Ansel Adam’s quote that “There’s nothing worse than a sharp picture of a fuzzy concept”.
It might be better to say craft alone does not make a great image. It is a table stake. You need it to get in the game. An excellently crafted image may not be great, but a poorly crafted image is very seldom great.
Craftsmanship is the base
Craftsmanship is a base we build our work on. But it is only a base, one of the legs of the stool. We also have to have vision and creativity and the drive to express them. I believe this expression cannot happen without solid craftsmanship.
I have said before that photography is one of the most technical of the arts. We are dependent on our equipment. Knowing how to use it correctly and effectively is absolutely critical to success.
We must study and practice and drill until it becomes second nature. Have you trained your hands to just “know” where the camera controls are? Can you use them in the dark? With gloves on? Can you quickly and almost instinctively determine the exposure solution that aligns with your intent for the image? Are composition and framing decisions happening rapidly in the background with little conscious thought?
When you’re out in the field working a scene you like, you don’t need to spend time juggling the technical tradeoffs in adjusting the camera. This distracts you from the artistic side. For instance, recognizing that this scene needs about f/8 to get the depth of focus you want and, since you are hand holding, at least 1/200th second shutter speed to insure a crisp image. Given that, are you willing to go to ISO 1600 to get these settings? These decisions should be almost instantaneous and subconscious.
This is not to say you are operating by habit or on automatic. Quite the opposite. It is a state of flow. You are channeling all the craft you know to focus on the moment at hand. It is exhilarating.
Photography is a craft
Photography is a craft. Most arts are, but it seems more obvious in photography. We cannot create without our tools. And we cannot create well unless we are proficient with our tools.
Let’s take a quick look at the chain of technologies required in photography.
On the capture side there is the camera, of course. They are not trivial anymore. The user manual for my Nikon Z7-II is 866 pages. That just describes all the settings available, not how to use them. Becoming skilled at using one of these is formidable. Luckily, most of us only use a subset of the capability.
And how much data do I need for what I am doing? Shooting full frame 40MPixels and above requires much more refined technique to achieve great results. Maybe what I’m doing today would be just fine with a 20MPixel APC camera. Do I have large and fast enough memory cards for my shoot? Enough batteries?
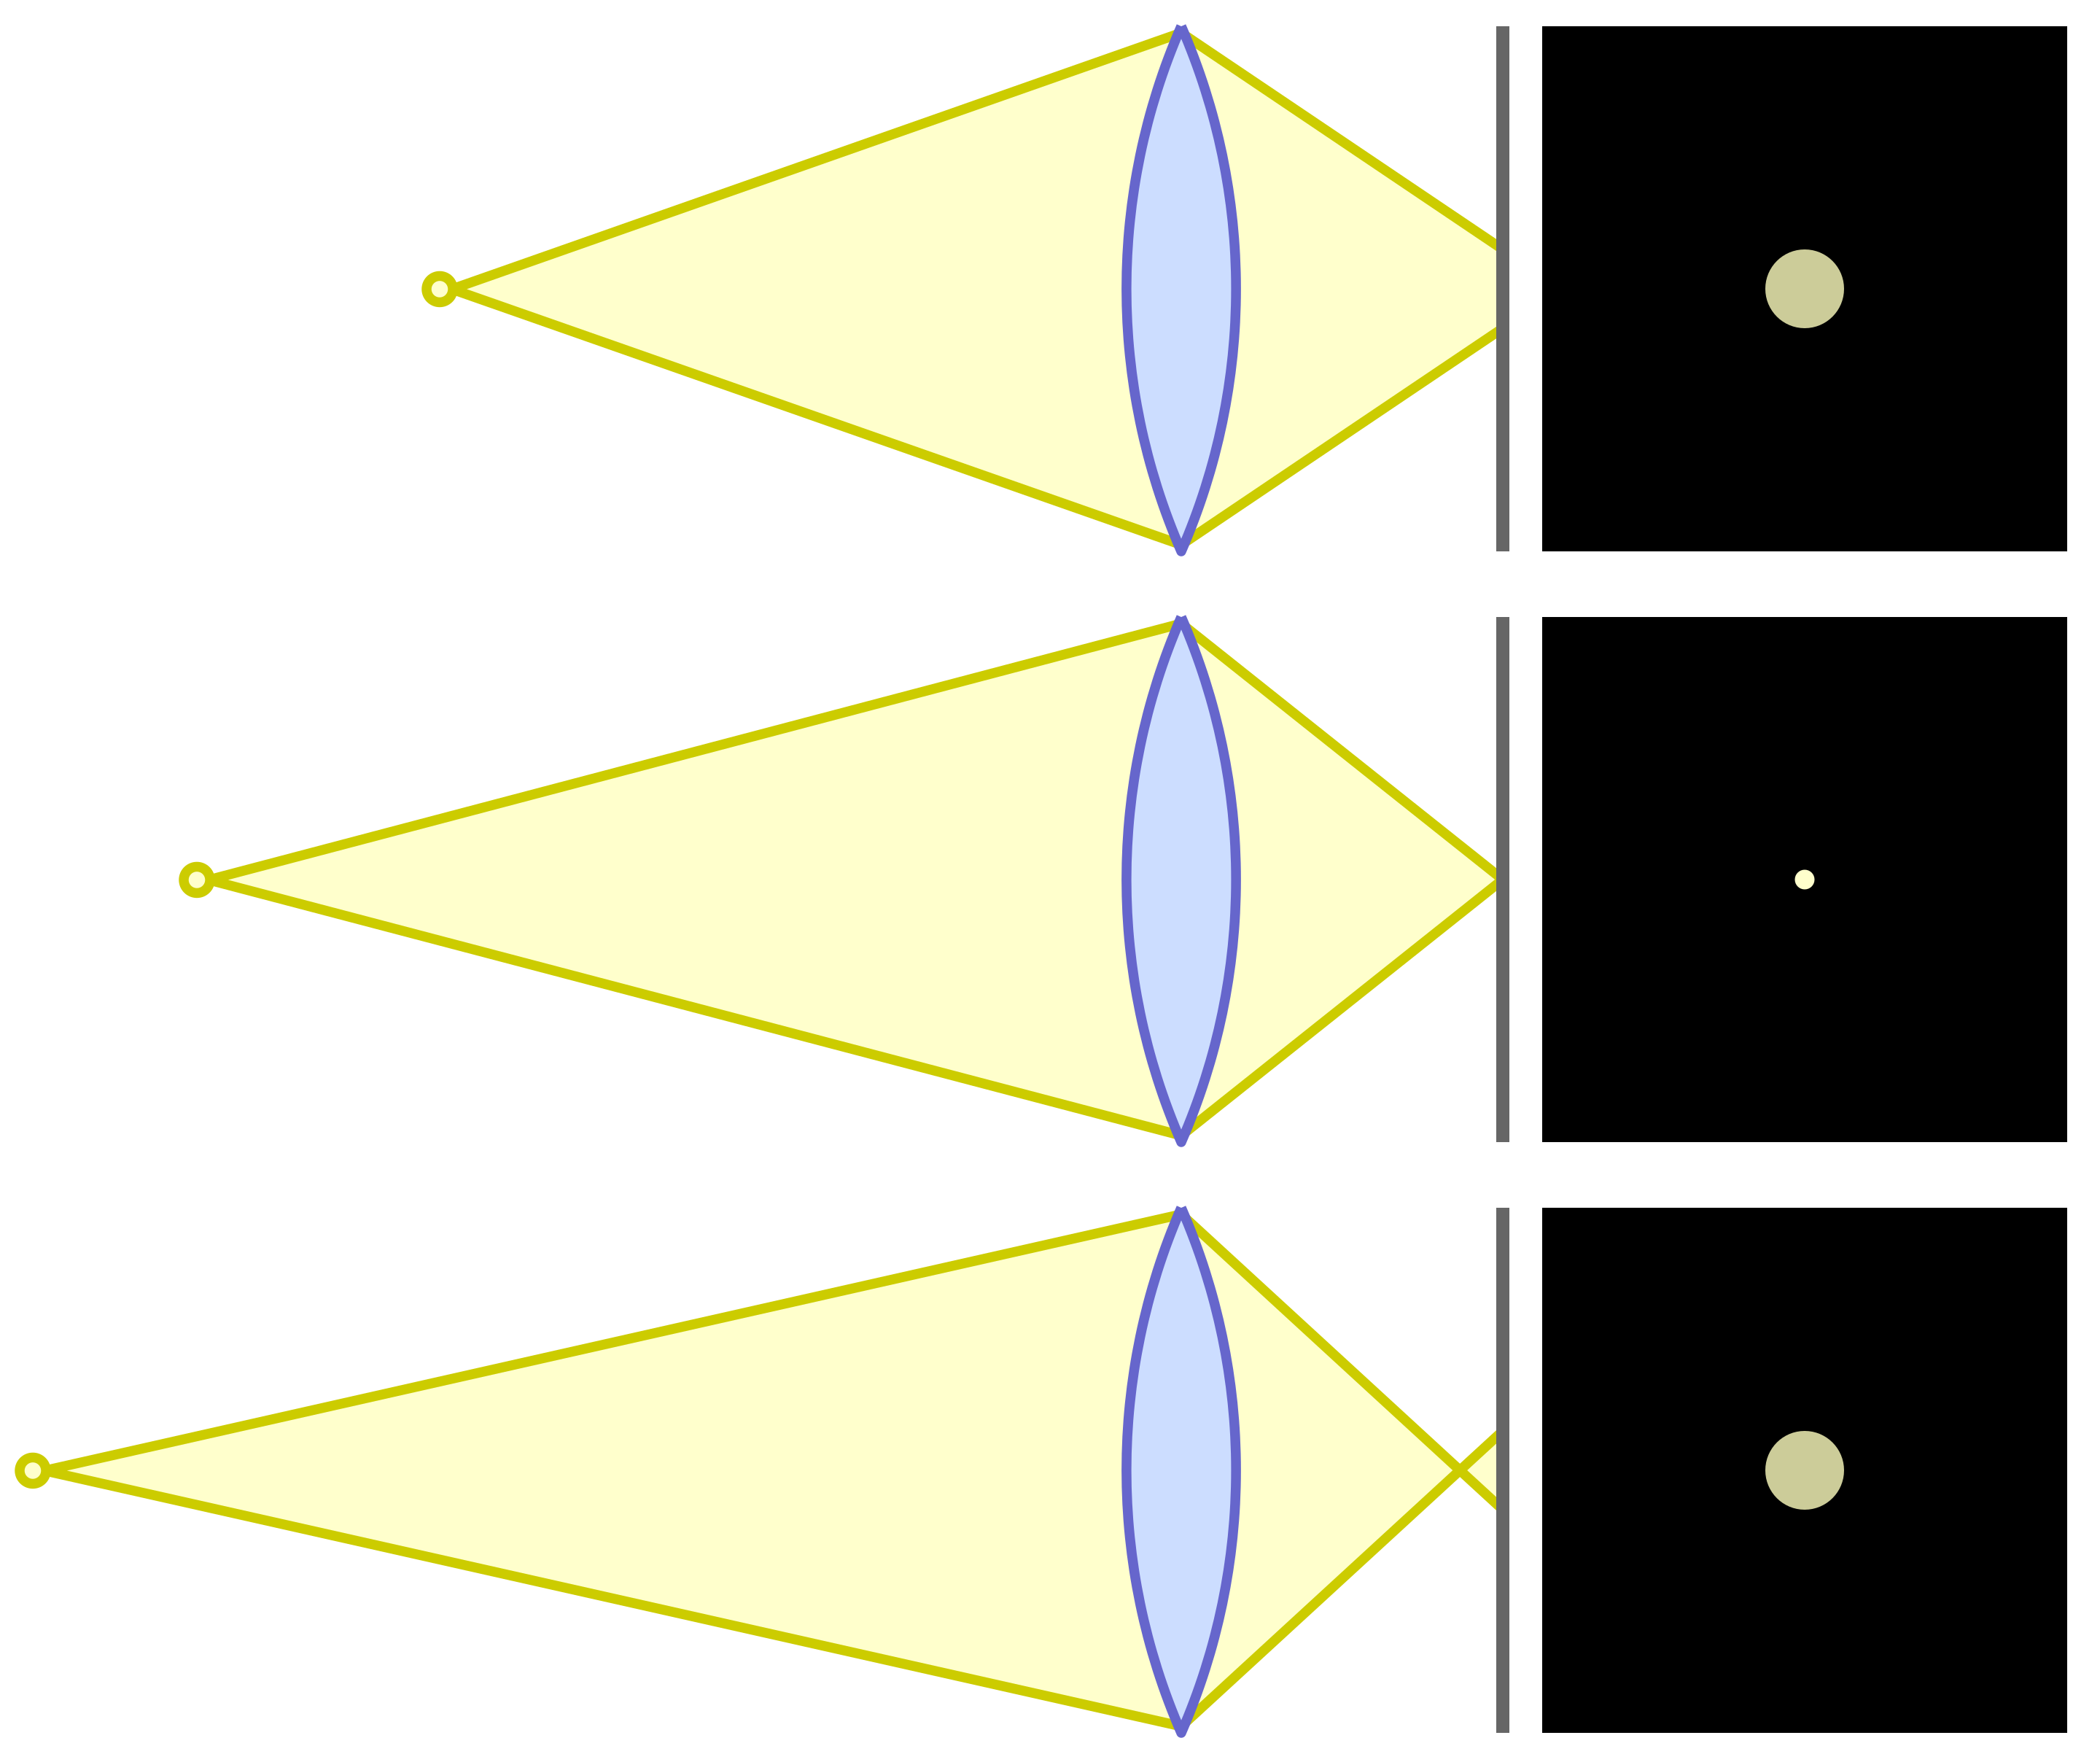
There are the lenses and filters to select. It takes training to understand the effects possible and how to select the right look for the situation. Should I use a zoom lens when I know it is theoretically possible get a little better sharpness with a prime lens?
Am I in the camp that says all images must be shot on a tripod? Or am I a hand-held guy? Or either, depending on the situation? Shooting hand held, do I know the techniques to get maximum sharpness? Or the techniques to shoot moving subjects?
What about capture file formats? White balance? Camera profile settings?
Processing
That’s just the capture of an image. If you shoot RAW images, which I hope you do, the images are useless until they have been processed intensely.
First, they have to be transferred to your computer. Do you have enough storage? My main image storage is currently using over 7 Terabytes. Then there’s multiple backup of that.
If you are processing high resolution files you will need significant computing power. Lots of memory and graphic processing power. And a great, color calibrated monitor. Hopefully of 5K or more. That power is required to be able to process images fluidly without having to wait for the machine to catch up. Waiting really breaks your concentration.
And of course, you use a color balanced process. Your camera and monitor are calibrated and you are using a wide color gamut system like ProPhoto RGB. A wide gamut allows lots of freedom in editing.
All that processing takes a lot of time. So when you go out and shoot 1000 images, don’t forget that they have to be processed, and culled and keyworded and filed.. For me, processing an image takes anywhere from 1 minute to 8 hours.
Output
How you process an image depends on what you are using it for. Getting something ready to post on social media probably just requires some color and tone correction and maybe cropping. Preparing an image for a print could take a long time.
Let me take the path of going to a print, since that is my preferred utilization.
A print is a physical object that is perceived different from an image on a screen. The viewing time of a print is usually much longer than an image on screen. As such, it generally needs to be processed to a higher standard. Very careful spotting – removing sensor dust spots – is critical. Spending time removing or mitigating distracting elements is usually important.
Many of the remaining decisions center on the characteristics of the final output. What size will the print be? What paper will be used. All papers have different properties and strengths and weaknesses. The paper can make the print look very different. Is it matte or glossy? Coated or uncoated? Heavy or thin? What color is it – papers aren’t necessarily white.
To get an estimate of the final result requires turning on proofing during the editing. The computer attempts to simulate the final printed result. Of course, to do that, you need accurate profiles for the paper and printer combination. But that is just an approximation. It may need more than one attempt. And what about out of gamut colors on your print? Handling those can be tricky and exasperating.
Build on it
That is a lot! And this is just talking about still photography. Photographers have to be expert at most of what I described. That is some of the craft involved. All of this craft has to be used intelligently in the process of making a great image. It’s why I say that photography is one of the most technical and craft-based arts.
But as much as we sometimes like to burrow into the fun details, the craft is a base. Build your base solid. But on top of the base, we need to build our artistic sensibility, our vision. We have to establish our style.
Craft means knowing how to use your tools to achieve the results you want. Maybe that is an ultra crisp, tack sharp image. Maybe it is a flowing abstract with no sharp pixels. Yours might run to dark and moody and underexposed. Somebody else might be bright and high key. Those are your choices. Whatever your vision leads you to do, it is your craft that allows you to achieve it.