An artists journey

Category: Technology

Ideas about the mechanics, techniques, and technology behind image making.

  • No Medium Format

    No Medium Format

    Despite their advantages, and as much as I would like to, there is no medium format camera in my plans any time soon.

    Fine tools

    It is a joy to use fine tools. The better we become in any craft, the more we appreciate our tools. After all, we use them frequently and tend to push them to their limits. I believe this is as true for a photographer as any other artist or craftsman.

    Plus, there is the ego boosting feeling of possessing and using something expensive and exceptionally well made. It makes us feel important. We must be a better artist, because we have better tools.

    Most photographers are familiar with mega-pixel lust and/or lens lust. We “need” the latest technology breakthroughs, the highest scoring products. They will make us better, right? Well, sometimes. But probably not by themselves.

    One of the ongoing lusts I fight is the desire to move to a medium format system.

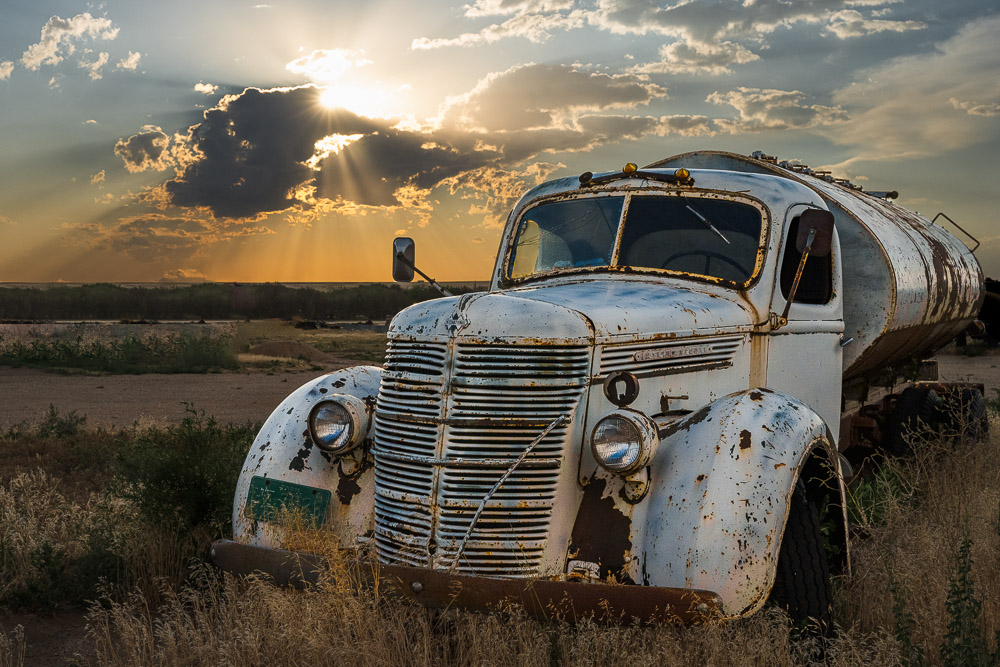
    Old rusty International Truck. I finally got it's portrait.©Ed Schlotzhauer

    Medium format

    Camera systems have always been characterized by the size of the recording medium they expose. In film it was 8×10, 5×7, 6×6 cm, down to 35 mm. Digital systems tended to smaller formats, because of the cost of the sensor chip. For a long time, the 35 mm “full frame” sensor was king. Other lower cost sizes also became common, like APS-C, micro 4/3, etc.

    The cameras in the slot between 5×7 and 35 mm are called medium format.

    Of course, there are many other contenders. Polaroid made a few huge sheets. There were 11×17 cameras. Others, especially in digital, range down to microscopic cameras small enough to fit unobtrusively in a pair of glasses. And don’t forget the tiny sensors in your phone, probably the most used cameras in the world today.

    One of those variations in the digital world was developed by the brave people who decided to push digital larger than 35 mm. Their goal was to recapture the detail and mystique of legends like the Hasselblad 6×6 cm or Mamiya 6×4.5 cm medium format systems.

    These huge sensor chips are a strain on semiconductor production. They are very expensive because the yields are low for such a large chip, and the production volume is small. But makers like PhaseOne, Hasselblad, and Fujifilm persisted and developed successful products, and the results seem to be spectacular.

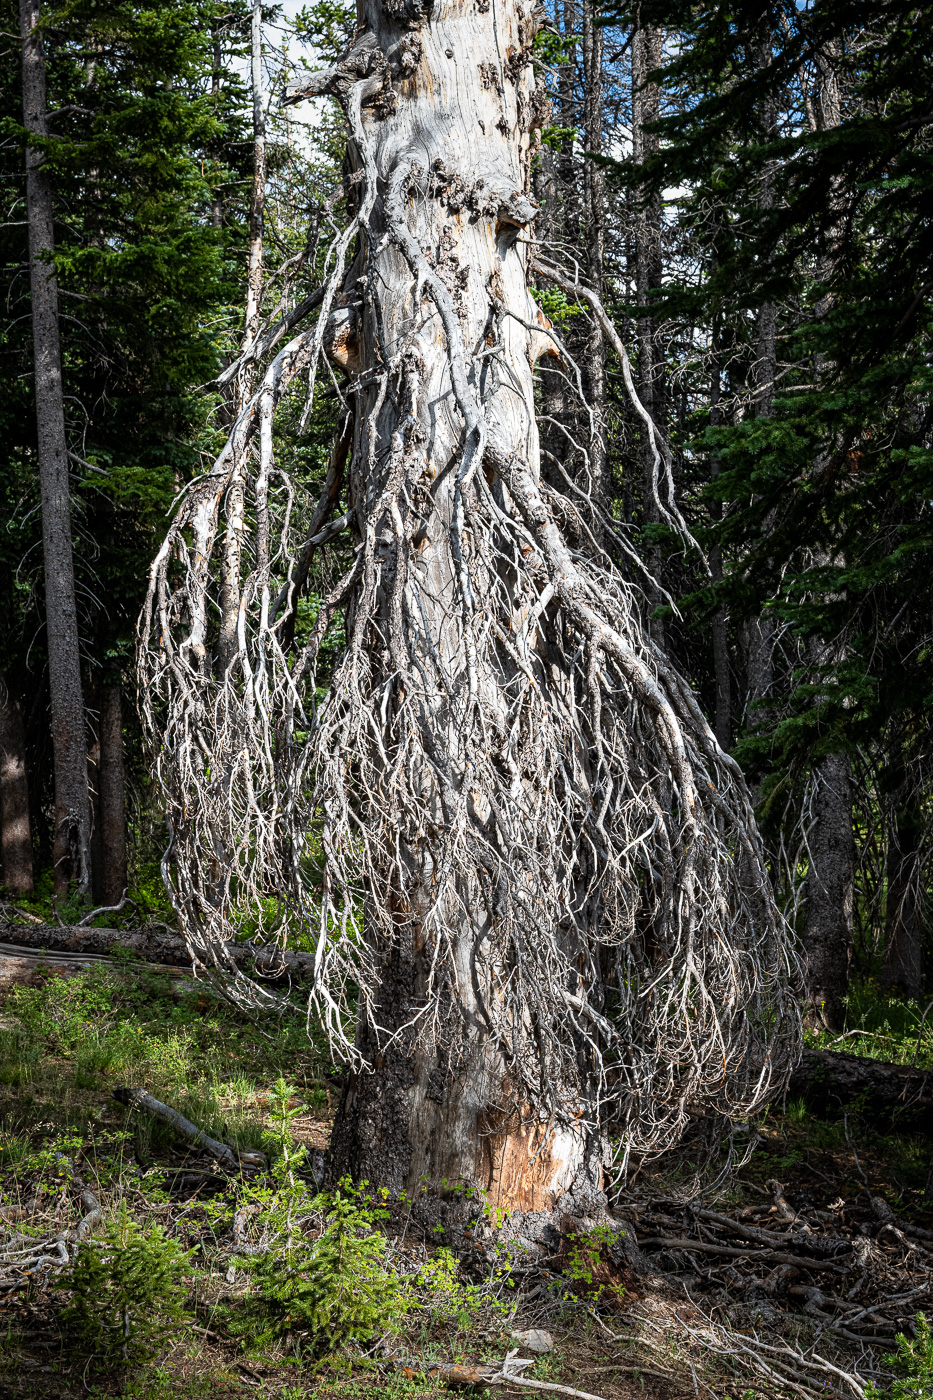
    Dead branches. Interesting range of tones.©Ed Schlotzhauer

    Advantages

    I do not speak from first-hand experience. Only from extensive research and reading. From what I can determine, the medium format digital systems are a marvel of image quality, with tangible and intangible properties that cannot be matched by 35 mm full frame cameras.

    One obvious thing is that the larger sensors have a larger number of pixels. Typical medium format cameras have 100 MPixels, compared to 60 for the highest resolution full frame camera today.

    But it is more than just number of pixels. The larger sensors allow larger pixel sites. This means each pixel gathers more light and each pixel has lower noise, greater dynamic range, and better color accuracy. Medium format lenses are also generally of higher quality than 35 mm ones.

    Overall, the whole system is high quality all the way through. This leads to files that can be printed at huge sizes with astounding detail and color.

    An image with some minor processing in Photoshop. It is well over 1GByte.©Ed Schlotzhauer

    Disadvantages

    Of course, these advantages do not come for free. Everything must scale up physically with the sensor size. This makes the cost of all the components, including the sensor and lenses, go up exponentially.

    Larger also means heavier. In a studio that is not a concern. But I shoot only outdoor, and I lug my equipment wherever I go. Heavy is bad. Big is bad. Medium format is both.

    I indicated that the lens sizes must scale up for medium format. The lens must create a larger image circle to cover the larger sensor. This not only makes them heavy and expensive, but the physics of lens design limits the practical ability to make wide range zoom lenses. So, currently, something like a 35 mm equivalent range of 28 mm to 75 mm is about the best that is common for a medium format zoom. Other sizes are available, but nothing like the “super zooms” we love in full frame cameras. Medium format wide angle lenses are much easier to make and more common.

    Underlying all of this is the sheer cost of the system. Buying into a medium format system with a reasonable selection of lenses can add up to 10’s of $1000s. Much more if you decide to go with PhaseOne. Do I want medium format or a new car? Medium format or a luxury anniversary trip to Europe?

    Reality

    The reality that the medium format system currently is too big and heavy, it is too expensive, and I can’t get the type of lenses I want to use. At least, this is true for my value system.

    My old body wants to shed weight I must carry, not add to it. Less is more when I am out for hours at a time. I seldom even carry a tripod anymore.

    The “mainstream” camera companies like Sony, Cannon and Nikon have done a great job of improving their full frame products. To the point where it is a hard decision to make the jump. Yes, I’m sure it is true that if I did an A/B comparison between my Nikon and a Hasselblad 100 MPixel I would agree that the Hasselblad was better. But maybe not better enough for my needs.

    Cost seems obvious. I am not earning enough from my photography to justify the huge increase in cost. I would have to rationalize it on factors other than cost, and I can’t right now.

    But for me, an overriding factor right now is lens availability. This is a very individual decision point of view. I have become a photographic minimalist. I don’t like carrying extra lenses and I don’t like changing lenses in the field. One simple reason, besides fear of dropping one off a cliff, is that I get far fewer dust spots on my sensor if I do not change lenses outdoors.

    I have adopted much of my vision around my marvelous Nikon 24-120 mm Z lens; it covers 98% of my needs. To the extent where my attitude now is that if this lens does not work, I will move to get the shot or make a different shot. I have made several multi-week trips now, taking only one camera body and one lens. It has worked great for me. No regrets. I can’t yet do this with a medium format system.

    Girl sitting on rock over cliff©Ed Schlotzhauer

    No compelling need

    I would love to use medium format. Just the sheer quality of the output would almost be worth it. Looking at the detail of my images at 1-to-1 on my monitor is a joy right now. I’m sure the joy would be even greater for a medium format image.

    But I understand the reality of my life is that I am not called on to make billboard sized prints where you could put your nose up to it and marvel at the detail. I am not required to do portraits that have glowing, lifelike skin tones and shading.

    Would I like to be able to shoot like this? Of course. We always long for the best tools, the next technology bump. But the cost is so great I cannot justify it.

    Fortunately, or unfortunately, Nikon has satisfied my basic needs with a high quality 46 MPixel sensor in a small mirror-less body, coupled with small lenses that meets my expectations. These cover my real-life needs. I can’t justify the change just for my ego.

    Canon and Sony also cover those needs with excellent products, but I am a long-time Nikon user.

    As of right now, there is no medium format system in my plans. It could change, but there is a high barrier to climb. I hope Nikon jumps their full frame system to 100 MPixel before I give in and take the plunge.

  • You Still Need To Backup

    You Still Need To Backup

    Backup is one of those hygiene subjects we would rather not think about or talk about. But it is important. You need to backup intentionally and consistently.

    Film days

    Back in the “good ole’ days of film”, (they weren’t really the good days) we never had to worry about backup. The developed film was the permanent physical backup.

    All we had to worry about was storing it properly and in a fireproof location. These days, finding a fireproof location is more of a challenge. Photographers who had some exceptionally valuable images might have duplicate film images created and stored in a vault or safety deposit box.

    I have many filing cabinet drawers full of slides and negatives. Sadly, I never look at them. Partly because they are old and I have improved a lot and changed my interests some. But mainly because, being physical instead of digital, they are hard to search and locate. I can’t see me ever taking the time to scan them all.

    Sunset, Oklahoma plains©Ed Schlotzhauer

    Digital days

    I expect the majority of you reading this shoot digital exclusively. I know I do. Digital has many advantages. Obviously, since it has almost completely taken over photography.

    But digital. has a huge disadvantage. The image data is ephemeral. It has no physical presence. If we delete the file, it is gone. Permanently, if it is not backed up.

    What would happen if your main image disk said “poof” and a little smoke leaks out? All your images are gone unless they are backed up. As if they never existed. Most of us would consider this a disaster.

    Tennessee Stream©Ed Schlotzhauer

    Disks fail

    But disks are very reliable, aren’t they? We can find published reliability numbers like 1,000,000 hours MTBF (mean time before failure). That sounds very safe.

    But those are projected statistics for large numbers of disks. My particular drive could fail tomorrow. And they do. I am sitting here looking at a stack of 11 failed disk drives that I am waiting to get in the mood to take outside and smash with a sledge hammer.

    SSD drives seem to be more reliable than rotating magnetic disks. Seem to be. But let me reveal a dirty secret about solid state drives: they are so unreliable that they are extensively engineered to mask their failures. Bits fail all the time. Whole sections of an SSD can go bad. The drives have sophisticated error correction algorithms built in to allow for this and keep them functioning with no apparent data loss. Kind of like RAID built in.

    They haven’t been around long enough to have conclusive data, but in general, SSD’s seem to be more reliable than magnetic disks. But they fail.

    Don’t get me wrong, SSD’s are an improvement, and I will switch when prices go down enough for the quantity of storage I need. My point, though, is that SSD’s still fail. They are not some magical device you can forever trust your valuable images to and be guaranteed safe.

    Rise Against, representing the daily struggle©Ed Schlotzhauer

    Clouds fail

    So, the obvious solution seems to be put all your data in the cloud. Right? Let somebody else handle the storage management.

    There are problems. Cloud storage gets pretty expensive in the quantities most serious photographers need. And keep in mind that this is an ongoing expense.

    And how fast is your internet for upload speed? I am fortunate to be served by one of the best internet providers in the nation. Theoretically, in perfect conditions, I could upload a Terabyte of data to the cloud in a little over 3 hours. IF everything is perfect and if the cloud storage could accept data that fast. Previous internet providers I had would take weeks to upload this much data, because upload speed was much slower than the download speed.

    But even if you successfully get your data into the cloud, it is now at the mercy of the service you use. They can go out of business, or change business models, or raise prices. If you use Azure or the Amazon cloud your data is probably pretty safe. Maybe even Adobe. But you have no control. I like to control what is important to me.

    Lightroom cloud?

    Maybe the Lightroom cloud storage is the right answer for you. It is for some. If you are just starting out in photography, it may be ideal for you.

    The latest data I saw said Adobe offers up to 1TByte of storage. That’s the tip of the iceberg of the 10 TBytes of image data I currently have. If they offer that much storage, it would be expensive. If I work an image in Photoshop and composite multiple images and use lots of layers, it can exceed 4GBytes for one image. That eats up terabytes fast.

    And to access your images, you must have internet access. I have a fantastic internet provider, but outages still happen occasionally. Yes, Lightroom stores a highly compressed small version of images locally on your computer, but that does.not seem good enough to me.

    There are some other reasons I will not use the cloud version of Lightroom, but they are not directly related to backup problems.

    Break all the rules: not sharp, subject centered, subject indistinct, no leading lines, etc.©Ed Schlotzhauer

    Seize control

    Digital image data is a blessing and a curse. There are significant advantages to it, but never forget, it can easily go away.

    So we must proactively manage our data. That means backup. An aggressive, thorough backup plan that you monitor. This is a time to be paranoid.

    If you are on a Mac, step one is to plug in a large external disk and enable Time Machine. This is the automatic backup system built into Macs. It is so good that it may, all by itself, be a reason to switch to Macs. I’m not kidding. Make sure it is configured to also backup your image data.

    I will give you a glimpse into how paranoid I am in protecting my data. Even though my main image storage is a RAID system, my data is backed up hourly to Time Machine, and daily to two external disks, one of which is a network attached RAID drive. Every week I also make a copy that I keep offsite, and about once a month I make another snapshot of my data that is kept offline and safe.

    Some local backup with a layer of cloud backup is a feasible alternative now, but so far, I have chosen not to go that route.

    That sounds like a lot of work, but except for the weekly and monthly offsite backups that are not normally physically connected, it is all automatic. Thank you Time Machine and Carbon Copy Cloner. The CCC plug is FYI and just to let you know the specific tool I use. I get no consideration for recommending it.A scene found walking through an airport©Ed Schlotzhauer

    Make it automatic

    I admit, I am paranoid about my digital assets. They have been created over a long time with lots of work and expense, and they are precious to me. I do not intend to loose them because of a preventable accident.

    Earlier I mentioned a stack of 11 failed disk drives. That is just the current accumulation. Many more have failed over my time of being a digital photographer. But I have never lost a file because of a disk failure.

    I believe a well thought out, in depth backup plan is a must for any serious photographer today. Perhaps I overdo it. But I am not willing to take the risk of doing too little.

    I have tried to be clear that this is just my way of doing backup. Like all photographic workflow decisions, it is usually a personal choice. Yours may be lighter weight or more rigorous. Do what works for you. But do it.

    Do not let backup be something you might remember to do once in a while, if you think of it. You won’t think of it at the right time. The clock is ticking.

  • Ethics of Editing

    Ethics of Editing

    I thought this question was completely discussed and laid to rest. But just in the last week I have seen 3 posts questioning the ethics of editing images. Not really saying it is wrong, just questioning it in general.

    Let me give you my conclusion so you can stop reading if you disagree: the question is wrong. It is not an ethical issue for art.

    Are photographs special?

    Because of its nature of recording the scene in front of the camera, some people still assume that photography is some kind of “pure” imaging form. That is, that what you see is reality. It is not and never has been.

    You would never make that assumption of a painting. It is clear to everyone that it is a constructed image. Even if it was painted as “plein air”, the artist would leave out things that distract and freely put in things that “should” be there.

    Just because the sensor (or film) images everything in the field of view of the lens does not certify that the resulting image is “truth”. And speaking of the field of view, changing it is a valid and common way to change the story you are telling. Zooming in on a small part or moving to the side a little may completely alter the message of the image. Is that ethical?

    Giant flamingos, in Colorado.©Ed Schlotzhauer

    Modifying darkroom prints

    Prints were routinely modified even from the days of film and darkroom printing. Filters made serious modification to tonal renderings in the captured negatives. Negatives were spotted to remove dust (or distractions). Dodging and burning further altered the tonality of the original scene.

    If you are familiar with Photoshop, you know that one of the layer blend modes is Screen. Do you know where this name came from? A way of compositing film images was to project 2 images together onto a screen, then re-photograph the resulting combined image.

    Photographers are resourceful. They find a way to make the image they need or want to make. Even if the result departs from the original.

    Modifying digital images

    But it is so much easier to alter digital images. Does that somehow make it unethical to do it?

    We have wonderful technology in our computers and image processing software. But would we be better artists if we printed our images “straight” – unmodified in any way?

    No, we would not. Digital sensors are amazing, but the straight output of a RAW file is bland, low contrast, probably with a bad color cast, and it has dust spots and distractions. You could never sell an image like this, and it would be foolish to even show it to viewers in this state. Other than to make a point about how important correction is.

    Even black & white prints are an advanced modification of color images. It is no longer a throwback to simpler and more pure times.

    We are expected to correct the color and contrast, to remove spots and distractions, to alter the lighting and tonality to make it more pleasing. You could never win a contest or be admitted to a gallery without doing at least those steps.

    Beyond that, pixels can be processed and combined much more freely than film images ever could. To say that it is wrong to do that with digital images is like saying that writing should only use the grammar and vocabulary of 19th Century English, because it was more pure.

    Antique narrow gauge steam locomotive snowplow©Ed Schlotzhauer

    Why do it?

    Is it too simple to say, “because we can”? Simple but true. We can. Pixels are raw material. They can be modified or combined or stretched or colored at our will. The same way that a painter can use any colors or put any brush strokes down on his canvas.

    What we choose to do depends on the image. Sometimes we compose the “final” shot almost entirely in camera. We recognize what we want to do, and we can make it happen in the field. These images still need a lot of work to bring out the quality we want, but the result may be very close to the scene as shot.

    But sometimes I go out shooting what I call “raw material”. These images are deliberately not intended to be a finished image by itself. They become parts blended or composited together with other parts to form a final image concept. Is that valid? Is it ethical? To me, completely.

    Terra Incognita©Ed Schlotzhauer

    When not to do it

    There are times that images should be labeled as “truth”. If you are representing the work as photojournalism or documentary, it should relatively unmodified. Relatively in the sense that it may be cropped or spotted or exposure balanced. Things like that that do not seriously alter the result that is presented to the viewer.

    Even so, there are the issues of point of view and field of view. I discussed field of view. For journalism what the photographer chooses not to show may completely change the ‘truth” of an image. And anyone, even a seasoned journalist, has a point of view they bring to the shoot. That POV determines how they represent the scenes, what to feature, how to frame it, etc.

    So, we must accept that what we see is the truth from their point of view.

    Kentucky Coal Miner©Ed Schlotzhauer

    Ethics?

    One of the articles I read recently asks “how much we can ethically alter a photograph?” My response is that only photojournalists and documentary photographers should be expected to “tell the truth”. Other than that, there are no ethics involved. The concept does not even apply to art.

    All other photographers are creating something artificial. The resulting image is a creative work of fiction. Trying to say that there is some artificial ethical limit on what they do is like saying all writers must only tell the absolute factual truth. I hope not. I like reading fiction.

    There are many reasons for creating images. A few uses of them should maintain a semblance of truth. Most do not have any link to truth.

    My images are only truth in the sense that I created them (no AI involved), they are my product, and they represent what I felt or believed at the moment. Any ethical questions are within my mind and based solely on my values. If anyone else raises an ethical concern about my work, I thank them for being interested, I might want to find out their concerns, but I would tell them to apply their ethical anxieties to their own work.

    Of all the things there might be to worry about in the world, the ethics of altering my images is not one of them.

    The real ethical dilemma

    There is a serious ethical issue that needs a lot more discussion. That is AI generated work and creating images that deliberately lie about events. But I am out of room here.

  • Know Your Masks

    Know Your Masks

    We all put on masks (not Covid ones, thankfully) all the time. Our masks make us look better to other people. But I’m not talking about our social interactions. We are image makers, so we also use masks in our editing tools to make our images look better. Both Photoshop and Lightroom have masks, but they are very different. Understanding the differences helps us better understand our craft.

    What are they

    In their simplest form, masks limit the extend of the edits we make to an image. All of our editing software lets us make global adjustments to an image, like increasing or decreasing the overall exposure. Most of our editors also allow us to restrict edits to selected parts of the image by masking.

    You know the situation. After we get the overall look of an image balanced the way we like we often have to “drill in” and work on smaller parts. For instance, maybe a part needs to be brightened to make it stand out the way we want or darkened to call less attention to itself. No matter what your software calls it, masks are used for this.

    But how we do it and how they work on the image can vary greatly.

    Old rusty International Truck. I finally got it's portrait.©Ed Schlotzhauer

    A mask

    In the general sense, a mask allows us to isolate part of an image so that we can make selective edits.

    Without masks all of our edits would be global. That is, what we do would affect the entire image. To selectively modify only parts of the image, though, we need the ability to restrict the area to be edited. In a sense, a mask is kind of like a stencil that keeps us from painting outside of an area.

    For photography, the concept of masks comes from the darkroom. In the traditional darkroom, printers used bits of paper or sheets with shapes cut out to hold light back from selected areas or to add light to selected areas during exposure of a print. This was called dodging and burning. It required a lot of planning, and it was a very tedious and labor-intensive process. One mistake and hours of work could be ruined. I personally am very glad we do not do that now.

    Lightroom vs Photoshop

    I’m going to use Lightroom Classic (which I will just call “Lightroom”) and Photoshop as my examples. They are what I know, and I think they are the most commonly used editors of their specific kind. Yes, kind, because for all their similarities they are 2 different kinds of thing. These differences are important to us, and we need to have some understanding of how they work in order to use them better.

    The most fundamental difference is that Lightroom never modifies pixels while Photoshop will gladly do anything you want to your pixels. Because of this basic difference, the way they deal with masking and editing is also completely different.

    In a sense, Adobe has created a problem for their users. They sell the 2 premier image editors. The products are tightly linked, and users often have to use both of them to accomplish their goals, but they are so different that it causes confusion.

    Line of very nice empty wine bottles©Ed Schlotzhauer

    Photoshop

    Photoshop was the first capable and widely used image editor. It springs from the days when images were only pixels. It is a pixel editor, even with adjustment layers and blending modes.

    Photoshop is a bare knife. It eagerly does whatever you tell it to do to your image. Like a sharp knife in skilled hands can do great work, the same knife in unskilled hands can be dangerous. Photoshop will shred your pixels with no remorse.

    Inside Photoshop, a mask is a black & white image that is attached to a layer. Whatever adjustment you do on the layer is restricted by the mask. The mantra is “white reveals and black conceals”. That is, where the mask is white the adjustments are made on the underlying image. Where the mask is black, the adjustment is ignored.

    But note that the mask is just another bitmap image. It can contain any set of pixels including shades of grey. For instance, sometimes frequency separation editing is done by doing something like taking, say, a copy of the green channel and pasting that into an adjustment layer as a mask. That is a complex mask, but Photoshop handles it easily.

    Also, we modify images by building up layers of changes. The order of the layers is very important in Photoshop. The changes are always applied in the order you specify in the layer stack and the results will probably change if the order is changed.

    So in Photoshop you can do anything you want to the pixels. They can be stretched and blurred and painted over and, well, there is little limit. Masks are just another kind of bitmap that lets us limit the area modified by a layer.

    Hiding in the abstract aspens©Ed Schlotzhauer

    Lightroom

    Lightroom Classic is the newer product and it brings a completely different design and technology approach. It is specialized to be the editor of RAW images like Photoshop is specialized to be the pixel editor.

    Lightroom has become my first and often only step in editing images. One reason I go to Photoshop less is because Lightroom has added very capable masking ability and they continue to enhance it.

    But masks in Lightroom are a totally different thing from Photoshop. Since Lightroom is designed to be incapable of destroying pixels, they have adopted a technology of keeping track of descriptions of the edits to be done rather than actually doing the edits. Same for masks and their edits. These descriptions are separate from the image. They are applied to the original RAW file whenever it needs to be viewed. And the order of edits usually does not matter.

    Generally, Lightroom masks are constructed by combinations of gradients and shapes and range selections and brush strokes. The shapes can be composed together to make complex and useful masks. Some “AI” aids are available as shortcuts for selecting the sky, or people, for instance.

    Sunset at 40,000 ft©Ed Schlotzhauer

    Lightroom markup example

    The edit descriptions are just text that is kept separate from the image and is processed by Lightroom as needed. Here is a sample of the instructions for one of my images. This is only part of the text file, it defines one mask:

    <crs:MaskGroupBasedCorrections>

        <rdf:Seq>

         <rdf:li>

          <rdf:Description

           crs:What=”Correction”

           crs:CorrectionAmount=”1″

           crs:CorrectionActive=”true”

           crs:CorrectionName=”Mask 1″

           crs:CorrectionSyncID=”4F05D072D78C40239D264FC0F8F45469″

           crs:LocalExposure=”0″

           crs:LocalHue=”0″

           crs:LocalSaturation=”0″

           crs:LocalContrast=”0″

           crs:LocalClarity=”0″

           crs:LocalSharpness=”0.215228″

           crs:LocalBrightness=”0″

           crs:LocalToningHue=”0″

           crs:LocalToningSaturation=”0″

           crs:LocalExposure2012=”0.27395″

           crs:LocalContrast2012=”-0.100282″

           crs:LocalHighlights2012=”0″

           crs:LocalShadows2012=”-0.188717″

           crs:LocalWhites2012=”0.127177″

           crs:LocalBlacks2012=”-0.061475″

           crs:LocalClarity2012=”0.730341″

           crs:LocalDehaze=”0.631532″

           crs:LocalLuminanceNoise=”0″

           crs:LocalMoire=”0″

           crs:LocalDefringe=”0″

           crs:LocalTemperature=”0.274462″

           crs:LocalTint=”-0.102011″

           crs:LocalTexture=”0.169762″

           crs:LocalGrain=”-0.100026″

           crs:LocalCurveRefineSaturation=”100″>

          <crs:CorrectionMasks>

           <rdf:Seq>

            <rdf:li

             crs:What=”Mask/CircularGradient”

             crs:MaskActive=”true”

             crs:MaskName=”Radial Gradient 1″

             crs:MaskBlendMode=”0″

             crs:MaskInverted=”false”

             crs:MaskSyncID=”780243712C904039AF01C58DADCB61FA”

             crs:MaskValue=”1″

             crs:Top=”0.219066″

             crs:Left=”0.694605″

             crs:Bottom=”0.301111″

             crs:Right=”0.787517″

             crs:Angle=”0″

             crs:Midpoint=”50″

             crs:Roundness=”0″

             crs:Feather=”34″

             crs:Flipped=”true”

             crs:Version=”2″/>

           </rdf:Seq>

          </crs:CorrectionMasks>

          </rdf:Description>

         </rdf:li>

        </rdf:Seq>

       </crs:MaskGroupBasedCorrections>

    It looks intimidating, but it is not made for us to read. We never see this unless we go looking for it. Computer Science people call this a markup language. Computers process it efficiently.

    It’s our technology

    Photoshop deals only with pixels, and it can change the actual pixels of your image in any way you would like. There is no limit, and it can make changes that are unrecoverable. Lightroom edits are more limited in scope and only deal with information about the adjustments you would like made to your image. A benefit of Lightroom is that it refuses to destroy any pixels.

    This applies to masking, too. Masks in Photoshop are bitmap images that can be as complex as the image itself. The mask is another layer to paint or edit like other images in Photoshop.

    Silhouetted tree at sunset with birds©Ed Schlotzhauer

    Masks in Lightroom are more limited, but still absolutely useful. The masks are combinations of the shapes Lightroom knows about and lists of changes to make within the shape. It does not matter what order you do adjustments in Lightroom.

    We need to be aware of these basic design features as we are using the products. Photoshop works directly on pixels. Lightroom keeps information about how to change the look of pixels. They are fundamentally different in design. When we do not keep these behaviors in mind, we can become frustrated when switching between the tools.

    It is part of the technology we use to create our art. The better we understand how it works the more skilled we can be at using the tools.

  • Photography is About Light

    Photography is About Light

    Stating the obvious? I think we sometimes forget the fundamentals of what we are doing and working with. No light, no photography. Photography is about light.

    Writing with light

    Remember that our word “photography” comes from 2 Greek words that together mean “writing with light”. So, from the beginning of our art form, it was understood that we were recording light on some type of photo sensitive material. Glass plates or tintype or film back then. Mostly digital sensors now.

    Technology changes but still we are recording light.

    Embrace that. It is what we are all about as photographers. Photography is about light.

    Low light is not no light

    Our technology improves all the time. It is possible to get sensors that do a fair job of imaging at 250,000 ISO. Maybe more. I don’t track the latest. The highest ISO I found with a quick scan was the Nikon D6 at 3,280,000!

    A 250,000 ISO is about 11 stops of additional exposure above a nominal ISO 100 setting. Eleven stops is a huge amount as exposures go. I haven’t tried it, but at ISO 250,000 I bet you could make a properly exposed landscape shot lit only by starlight.

    But the point is that very low light is not the same as no light. Have you ever been in a cavern deep underground where they turned off all lights at some point? Then we encounter the eerie experience of actual, total blackness. In those conditions it is impossible to see anything. Put your hand right in front of your face and you can’t tell it’s there. There are absolutely no photons to impinge on our retina.

    We could do no photography in total blackness. Of course, other artists would be almost equally disadvantaged. I suppose, theoretically, painters could make marks on their canvas in total blackness, but they would have no way to know what they were creating. Sculptors could mold clay by feel, but they would have very limited feedback on what they were doing. But photographers cannot do anything without light.

    Night shot, Airport.©Ed Schlotzhauer

    Computational photography

    One clever way to get better results in low light is used in your cell phone and by astronomers. It is generally called “computational photography”.

    Computational photography does not rely on the result of one frame. Instead, tens to thousands of shots are taken and processed by computer to bring out detail.

    This is how your phone takes decent pictures in low light despite having a tiny sensor. It is actually shooting bursts of dozens of frames. Then it quickly processes them in the phone. It uses averaging and other more sophisticated techniques to reduce noise and bring out the desired detail. I am surprised at how well it works.

    Astronomers have special needs in photographing distant galaxies. The light levers are so low that there is nothing to see with our eye. So, they instead take hundreds, maybe thousands of images with the regular sensor on their telescope and run them through dedicated processing software. Using combinations of specialized image processing algorithms and AI, their computers “reconstruct” what is probably there.

    My astronomer friends have shown me some of their new “telescopes” they got recently. These surprising instruments are generally about the size of a moderately thick hard cover book. They rely on small, cheap optics and lots of computation, but produce amazing results.

    Techniques like these let images be created in what seems like black conditions. But the reality is, it is not black. Just very low levels of lighting. If it was actually black, no photography.

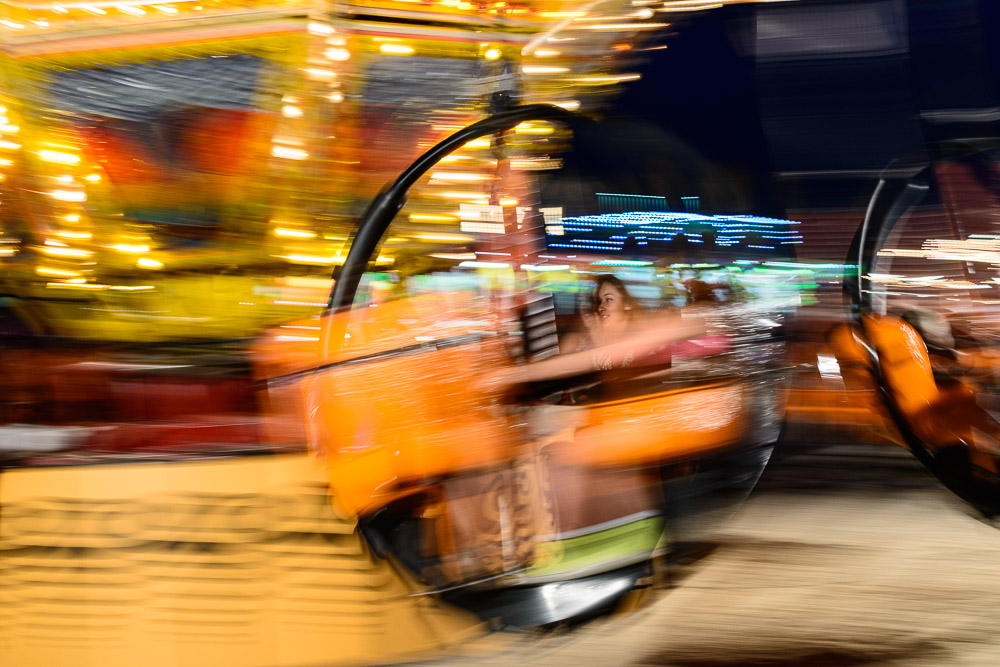
    A blurry night shot©Ed Schlotzhauer

    See the light

    As I said, the purpose of this is to remind us that our art is based on light. We need to develop a heightened awareness of the light around us, because it is critical to our art. It changes all the time and is different in different conditions.

    it has been observed that a fish probably does not think about water. But we need to think about light, which is almost as important to us as water is to a fish.

    Light has many characteristics and most all of them affect our photography.

    We need to be intensely aware of the quantity of light at any time, its color, is it direct or diffuse, its angle, whether it is steady or changing, is our subject lit directly or indirectly, and many other properties. It sounds complicated. But learning the light is part of the craft. Learning to apply it creatively is part of the art.

    For instance, it is almost an axiom of photography that you do not photograph in the middle of the day. Like the “rule of thirds”, this is one of those rules I take pleasure in violating. The reality is that it completely depends on what subjects you are shooting, the nature of your light source, and what your goals are. Shooting at midday often enhances the texture of materials. In a dense forest it can create interesting dappled light patterns. In a slot canyon or a cathedral, it can create beautiful light beams. And diffuse overcast light may be perfect for many subjects, with high brightness and soft, even illumination.

    Dead branches. Interesting range of tones.©Ed Schlotzhauer

    And as a practical matter, I am not a National Geographic photographer on assignment. I can’t spend a week in the field waiting for the “perfect” shot I went out to find. I have to be creative enough to make the best use of what I find at the time I’m there.

    There are no rules, only what you can do with what you have.

    Tonality

    Tonality is one of those important things we need to think about and know how to use. It simply refers to the difference of luminance of the parts of our image. The tonality is what lets us distinguish all the parts. It creates separation of various areas.

    Think of a blank white piece of paper. This effectively has zero tonality. There is no image, because without tonal separation we cannot resolve anything. Any actual image we create has a range of tones.

    If the tones are squished together, our image is low contrast. Not much tonal separation. Maybe this is what you want, like a foggy scene.

    On a sunny day there is a wide range of tones. We refer to it as high contrast. Sometimes it can be too much. Do we need to use exposure or editing techniques to tame the contrast? But that is our creative choice

    A low-key image involves pushing most of the tones down towards dark. But the remaining light tones stand out. Likewise, if we create a high-key image, with most of the tones pushed toward light, the remaining dark tones stand out.

    Our eyes are very sensitive to tonality. We perceive tiny differences in illumination levels. Use of tones is a creative process. It should be part of our thought process and toolbox.

    One of the ultimate expressions of pure tonality is black & white photography. All color is stripped away, leaving only tonality to create the image.

    Tree reflection. Black & white.©Ed Schlotzhauer

    Color

    Our eyes are an incredible design. The rods and cones have different purposes but work together to give us sight. But overall, our eye is less sensitive to color than to illumination levels.

    Think of being in a dim room at night. We can make out the objects around us, but the colors are hard to distinguish. Turn the light on fully and the colors pop.

    Similarly, in our images, good color requires good light. We can’t see vibrant, saturated color in dim light. I mentioned low key art. Have you noticed that most of it is black & white? This is a practical result of not being able to see much color in low light.

    I believe some people’s artistic vision is drawn to color and some to black & white. If you are a color person you have to be doubly aware of light. Not enough and our brilliant colors fade.

    Graffiti abstract©Ed Schlotzhauer

    Creativity

    All art processes are defined by their technology. Photography is based on light. We cannot do photography without light. To be a photographic artist, we need to be intensely aware of light and how to use it to our advantage.

    Recognize it not as a limitation, but as a creative tool. Light is a marvelously varied thing. We are artists. We paint with light. Learning it and being constantly aware of it and deciding how we want to use it for any image is part of the art.

    We are seldom in a place where there is no light, like the underground cavern I mentioned earlier. There is always light around. It may just be moonlight or city lights or a flash. We may decide there is not enough light to make the image we want sometimes, but there is always light to work with. Recognize it. Use it creatively.

    Light is fundamental to photography. Learn to see it for what it is and learn to use it creatively. It is what you are photographing.